Knowledge Base
Configuring Auto Scale
Web Auto Scale Rules
The Auto Scale rules are setup to give you the most flexibility and control over how your application scales under load. This article will explore the process of setting up a rule and highlight Dynoscale's auto scale rule functionality. Learn more about Heroku Autoscaling or Advanced Heroku Autoscaling in our blog.
- Introducing the Auto Scale Rule
- Working with an Auto Scale Rule - Dyno Limit
- Working with an Auto Scale Rule - Scaling Thresholds
- Working with an Auto Scale Rule - Saving
- Default Rules and Other Rules
- Reordering Rules
- Turn on Auto Scale Rules
Introducing the Auto Scale Rule

Navigate to the Web Auto Scale Rules page and take a look at the Auto Scale rule. Click on the blue edit rule button.
Working with an Auto Scale Rule - Dyno Limits
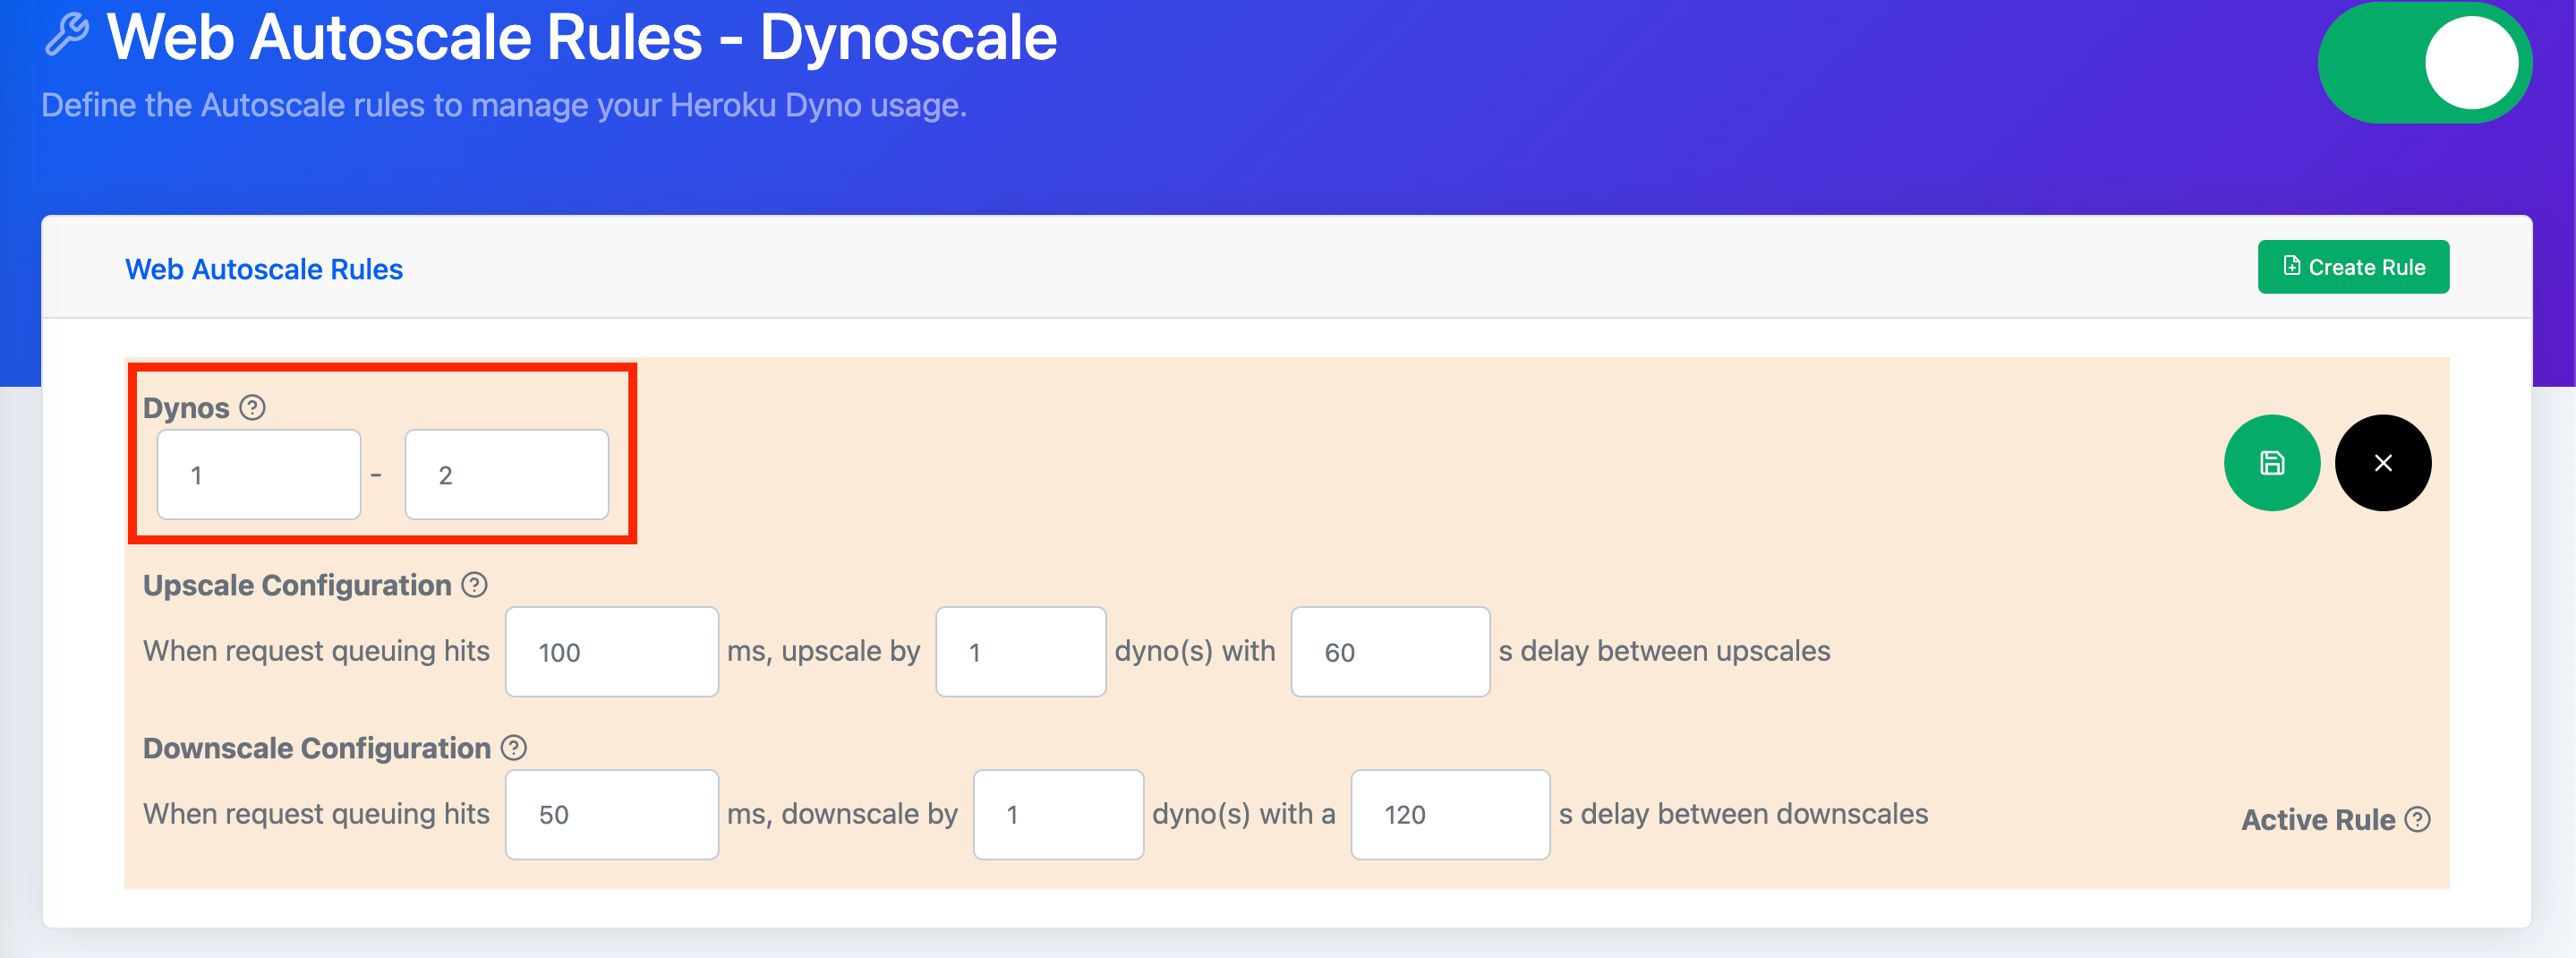
On the upper left side of the rule you can see the upper and lower bound for dynos. These bounds set the max/min dynos this rule will permit. For a relatively low traffic application with some periods of high traffic its sensible to set the lowerbound to 1 and the upperbound to 2.
Working with an Auto Scale Rule - Scaling Thresholds
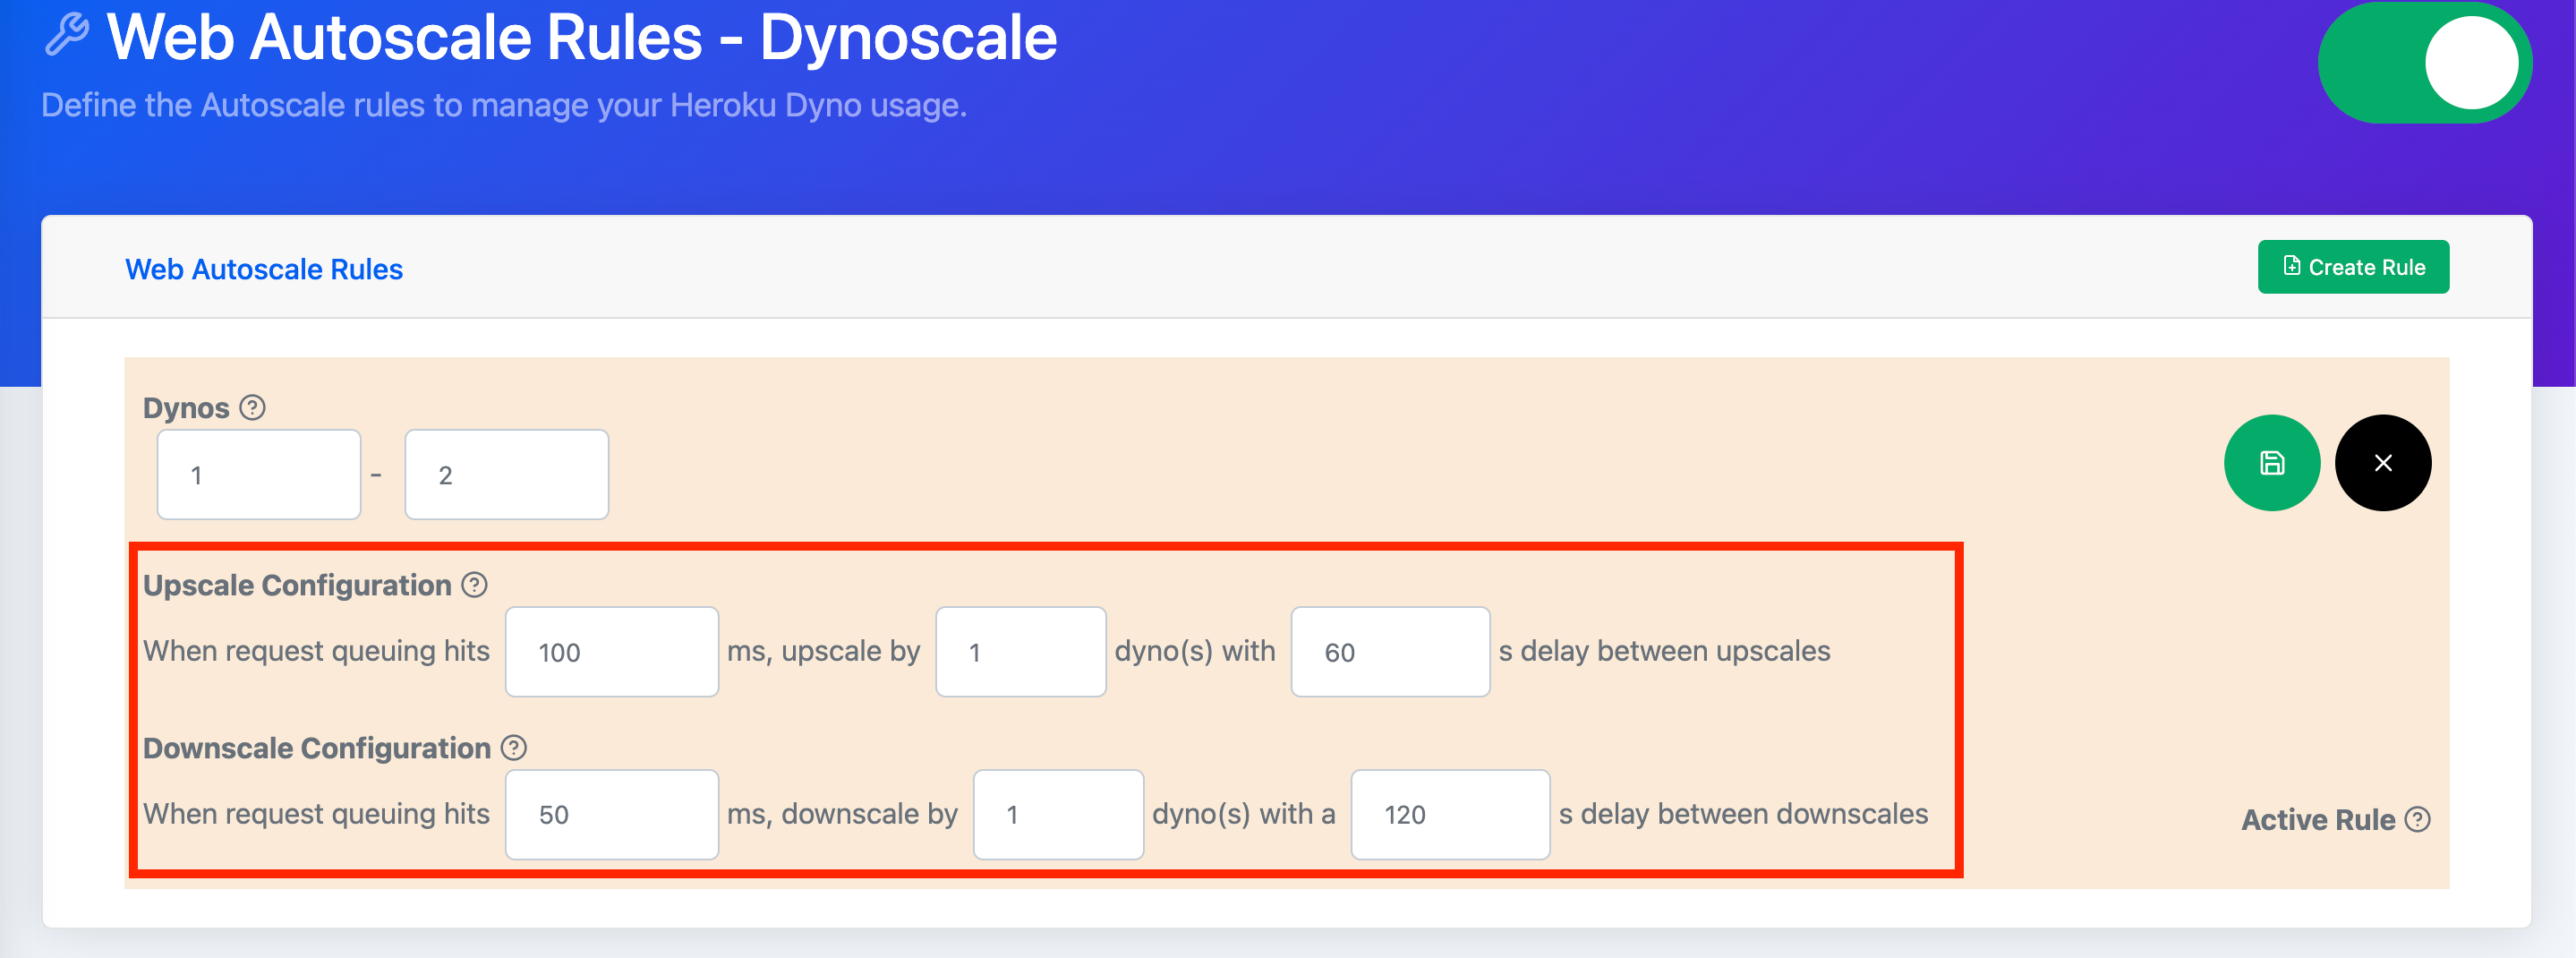
On the lower left side of the rule you can see the Upscale and Downscale Configuration. On the Upscale configuration, the first field is the request queue threshold. It determines when more dynos are needed to meet the traffic needs of your application. Once the threshold is exceeded, Dynoscale will upscale your application by an increment set in the next field. Finally, to avoid frequent scale ups, the last field delays incremental scaleups with a buffer time.
On the Downscale configuration, the first field is the request queue threshold. It determines when to reduce the dynos needed to meet the traffics needs of your application. Once the request queue drops below the threshold, Dynoscale will downscale your application by an increment set in the next field. Finally, to avoid frequent scaling, the last field delays incremental scale downs with a buffer time.
Working with an Auto Scale Rule - Saving
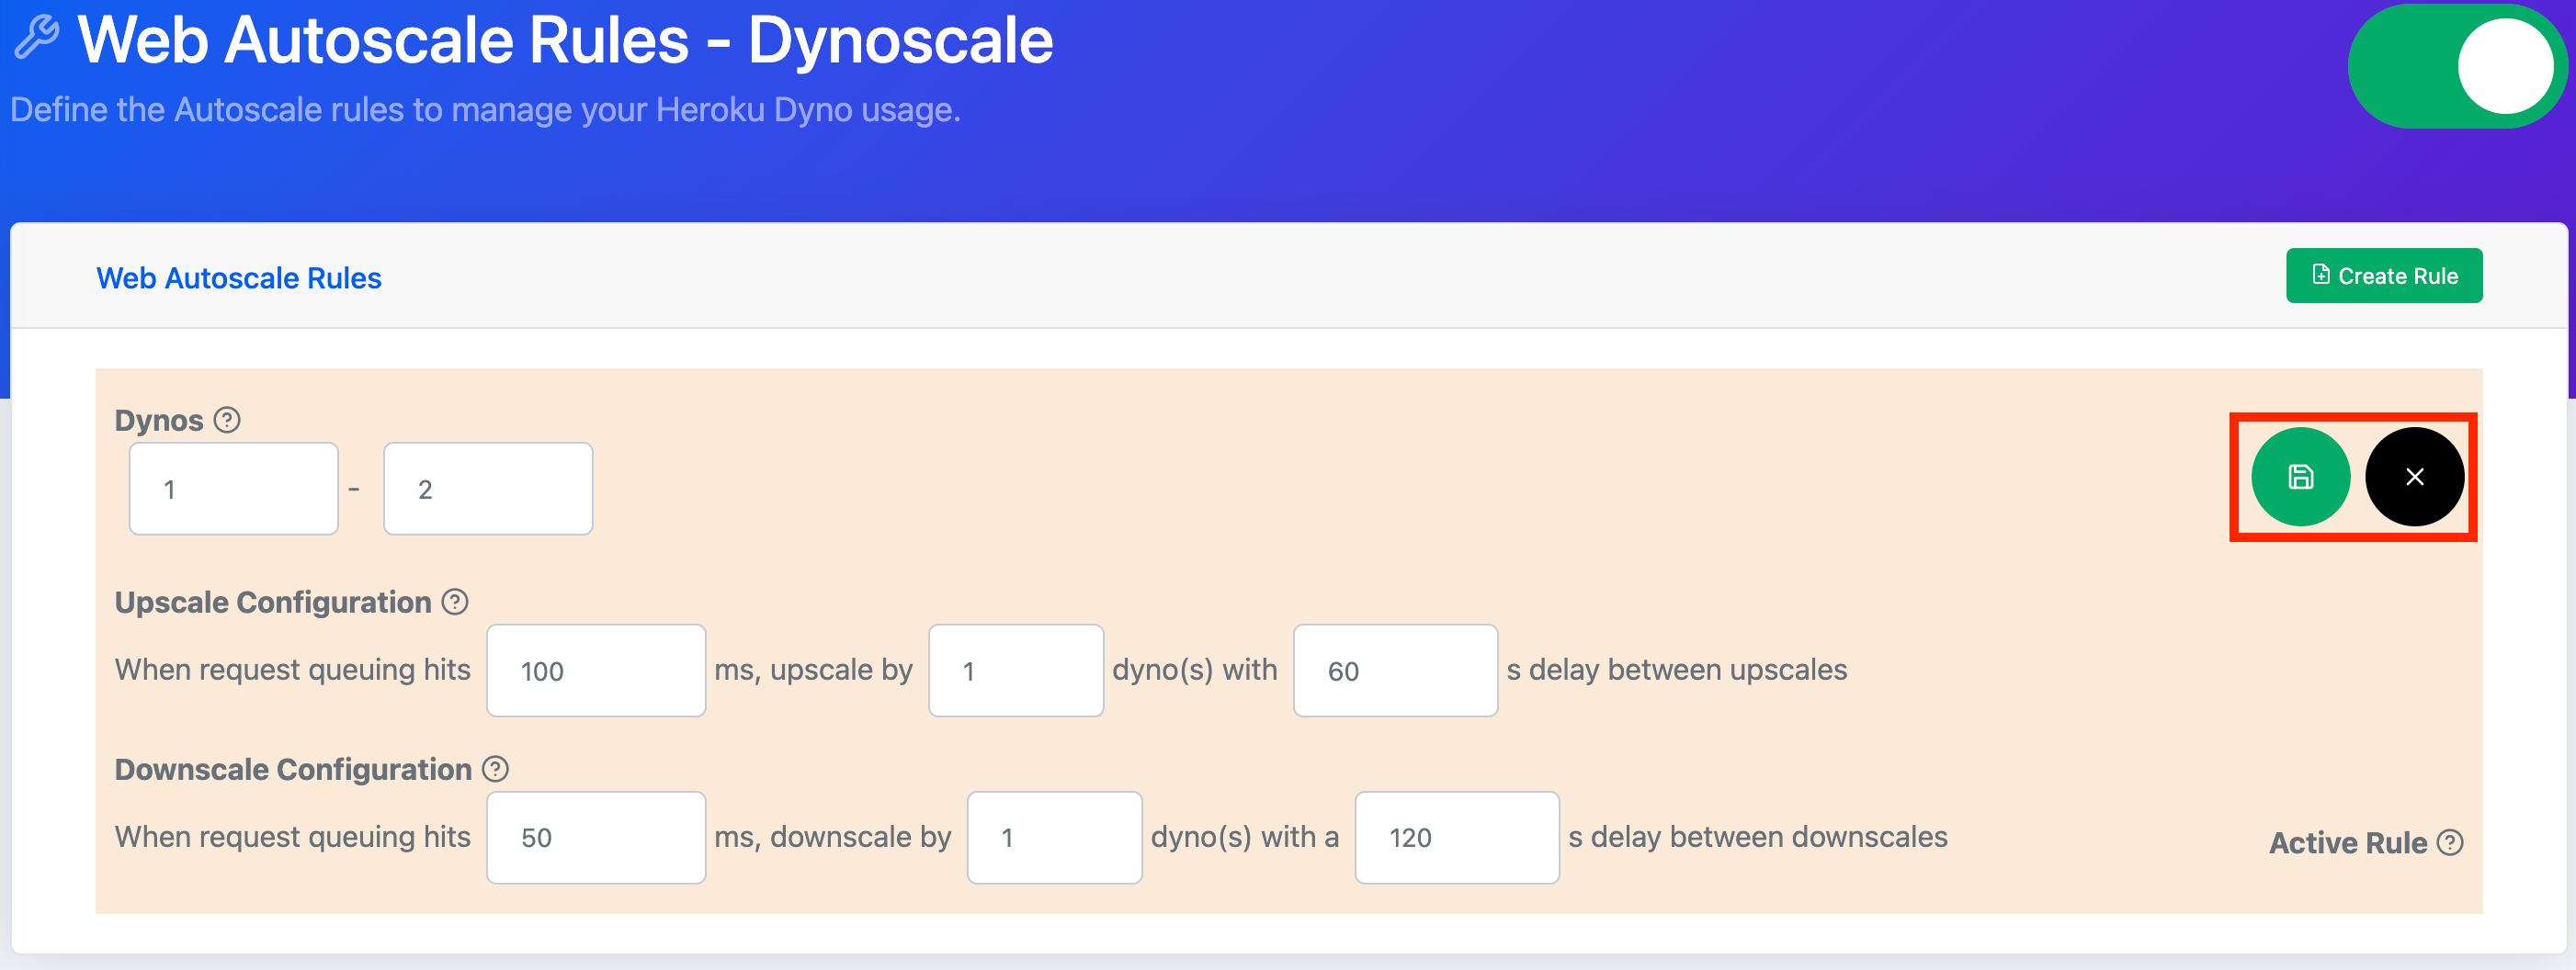
Once you are happy with a rule, click on the green save button in the upper right side of the rule. Alternatively, if you don't want to save changes, click on the black cancel button.
Default Rules and Other Rules
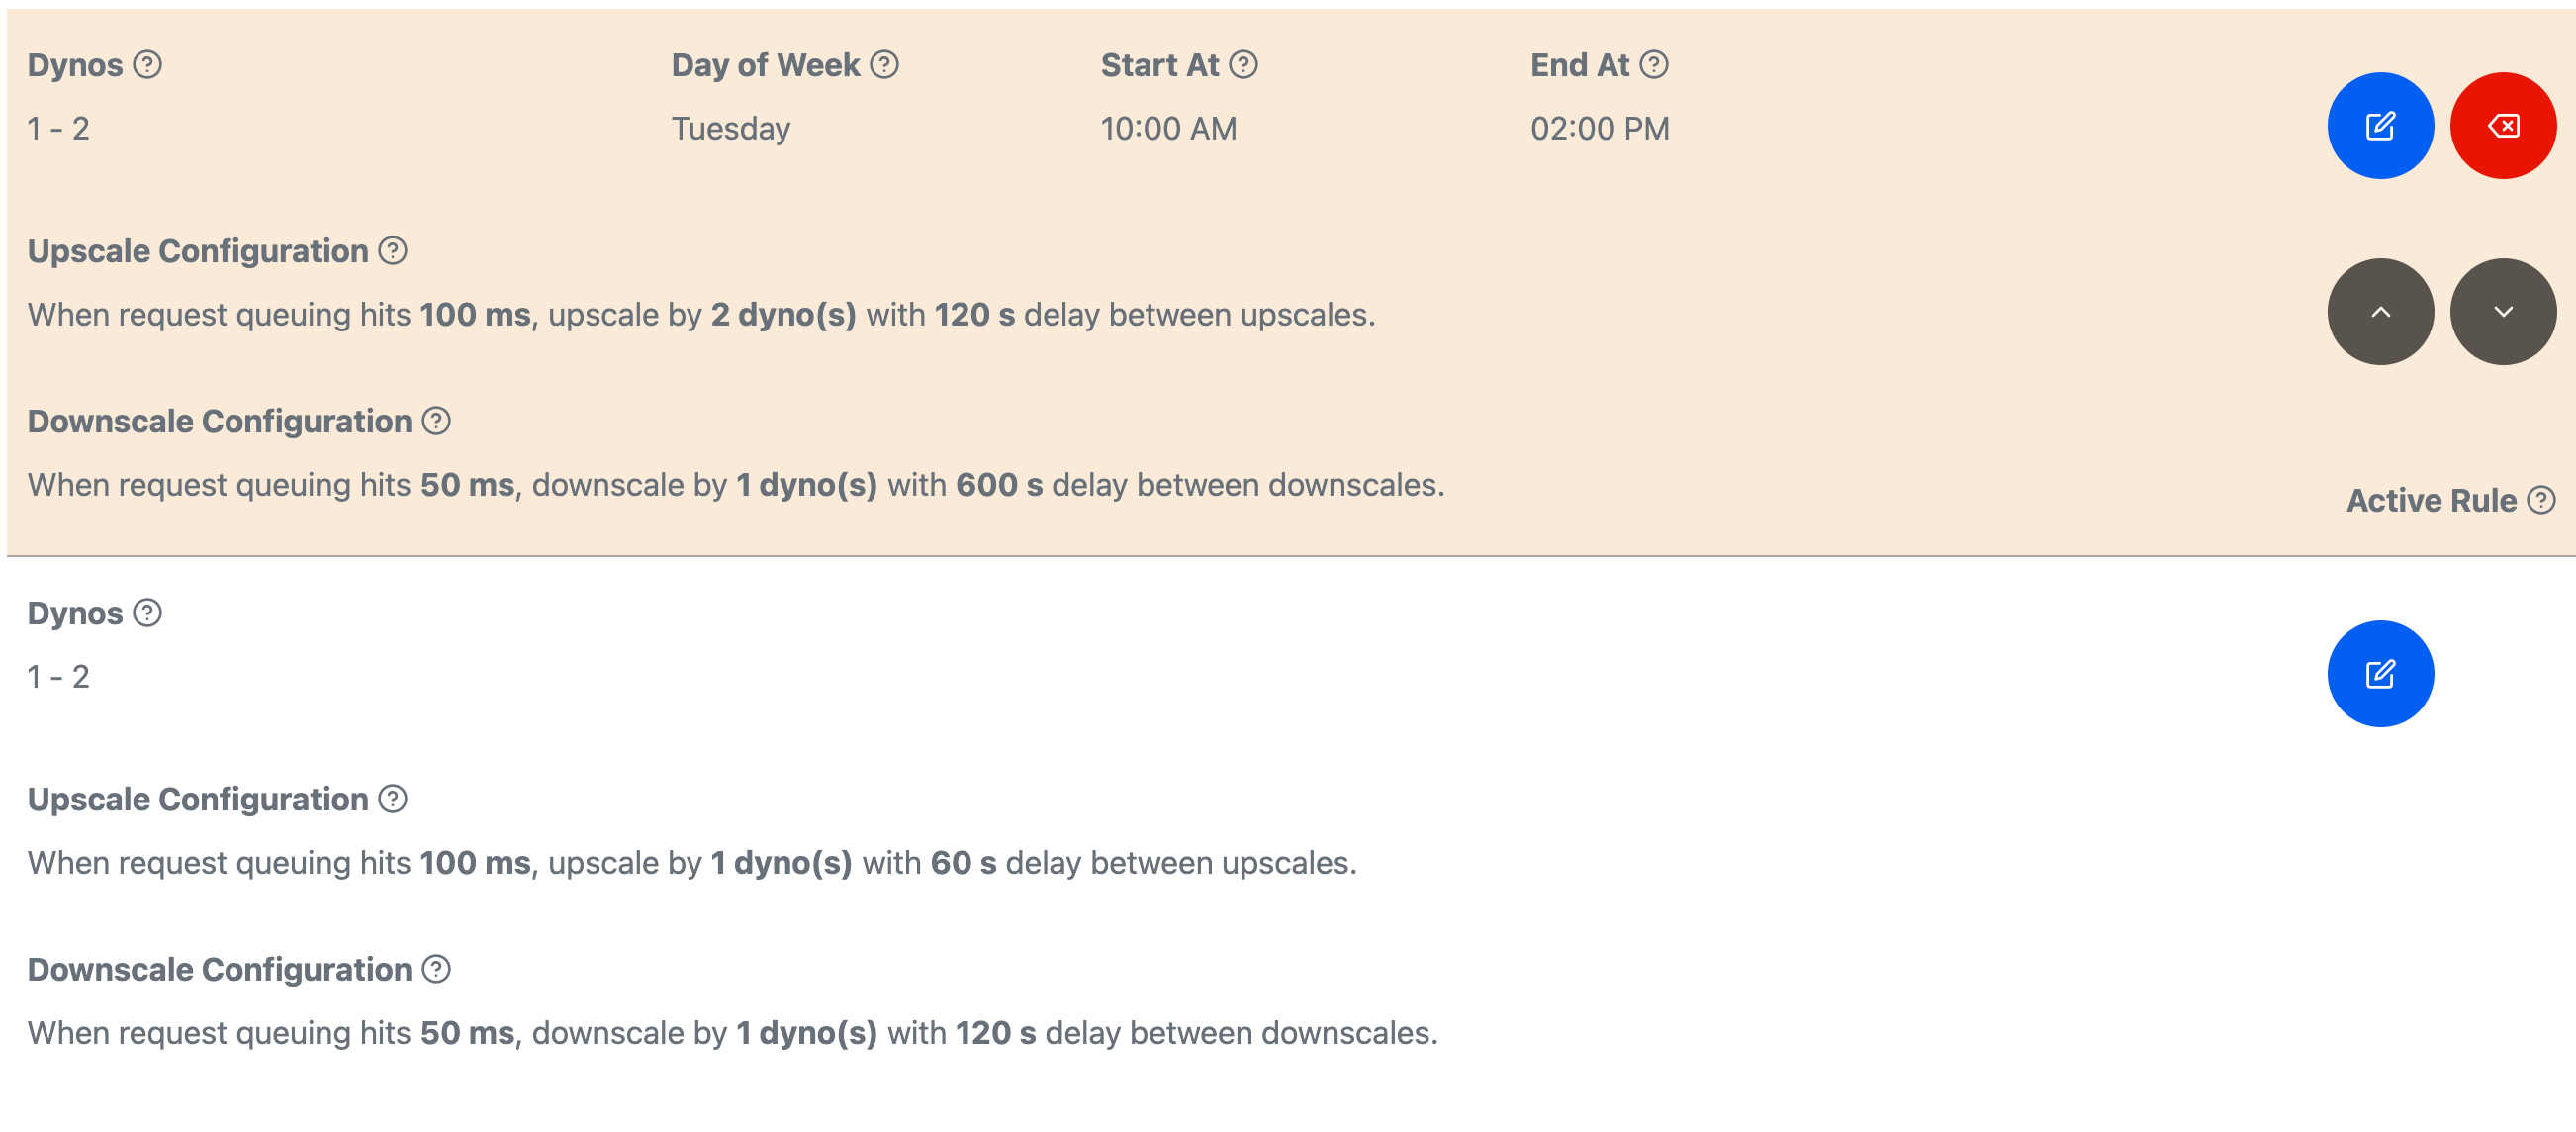
An application must have a default rule. It dictates how the application should scale when other rules are not active. To create another rule, click on the "Create Rule" button at the top of the Auto Scale Rule page. You will notice that unlike the default rule, this rule has a dropdown for day of week and fields for start/end times. These fields determine when a rule is active. When rules overlap in time, the topmost rule is selected first.
Reordering Rules
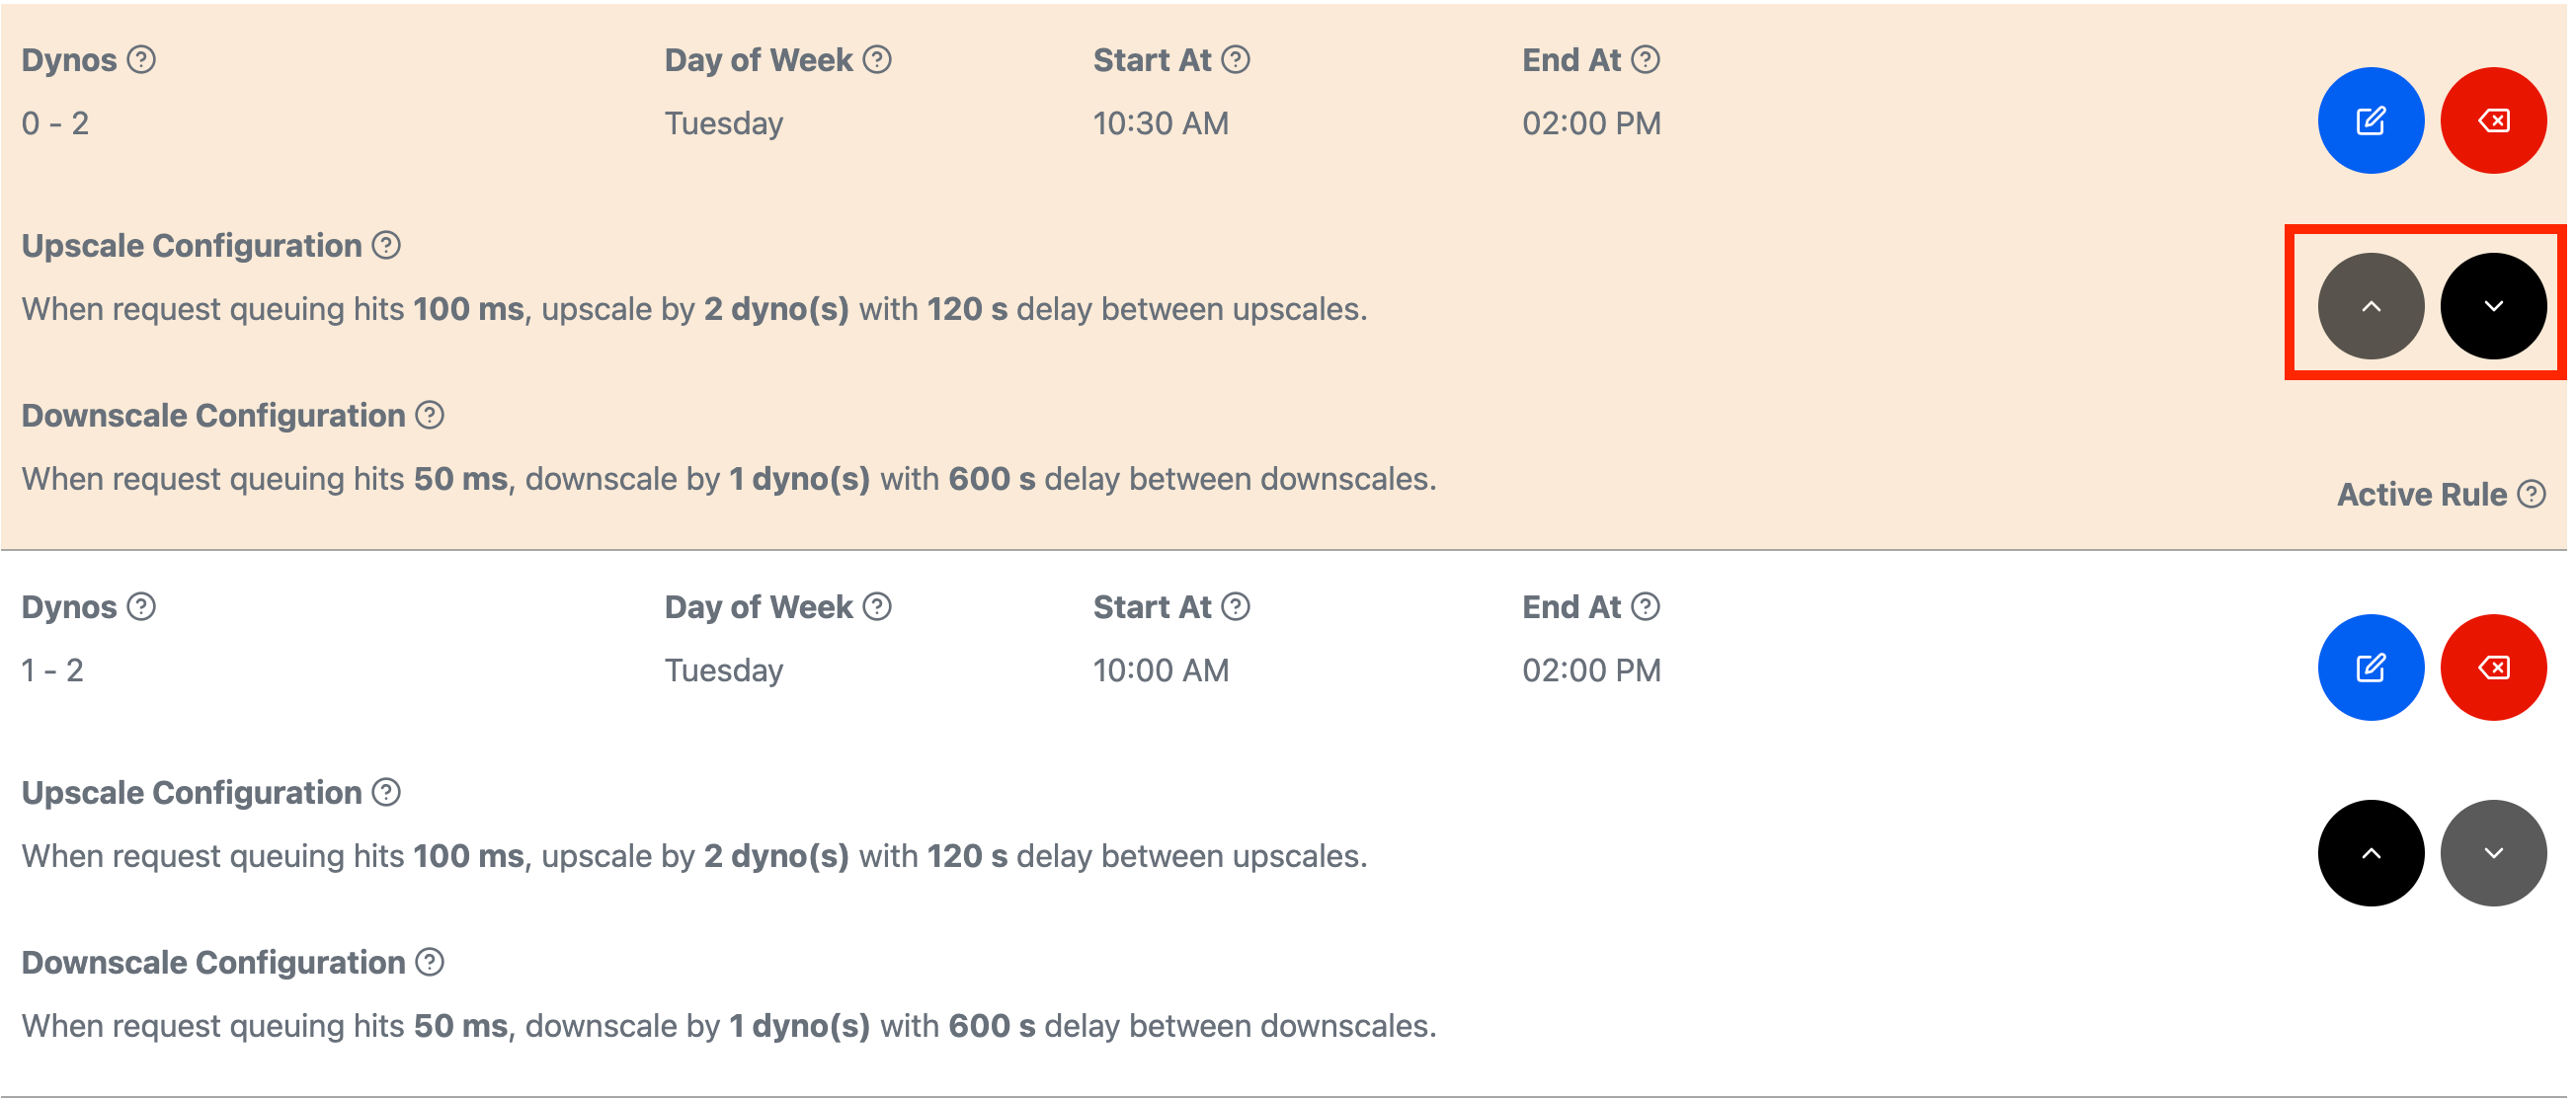
To shift the priority of a rule, you can use the black arrow buttons on the right side of any non-default rule.
Turn on Auto Scale Rules
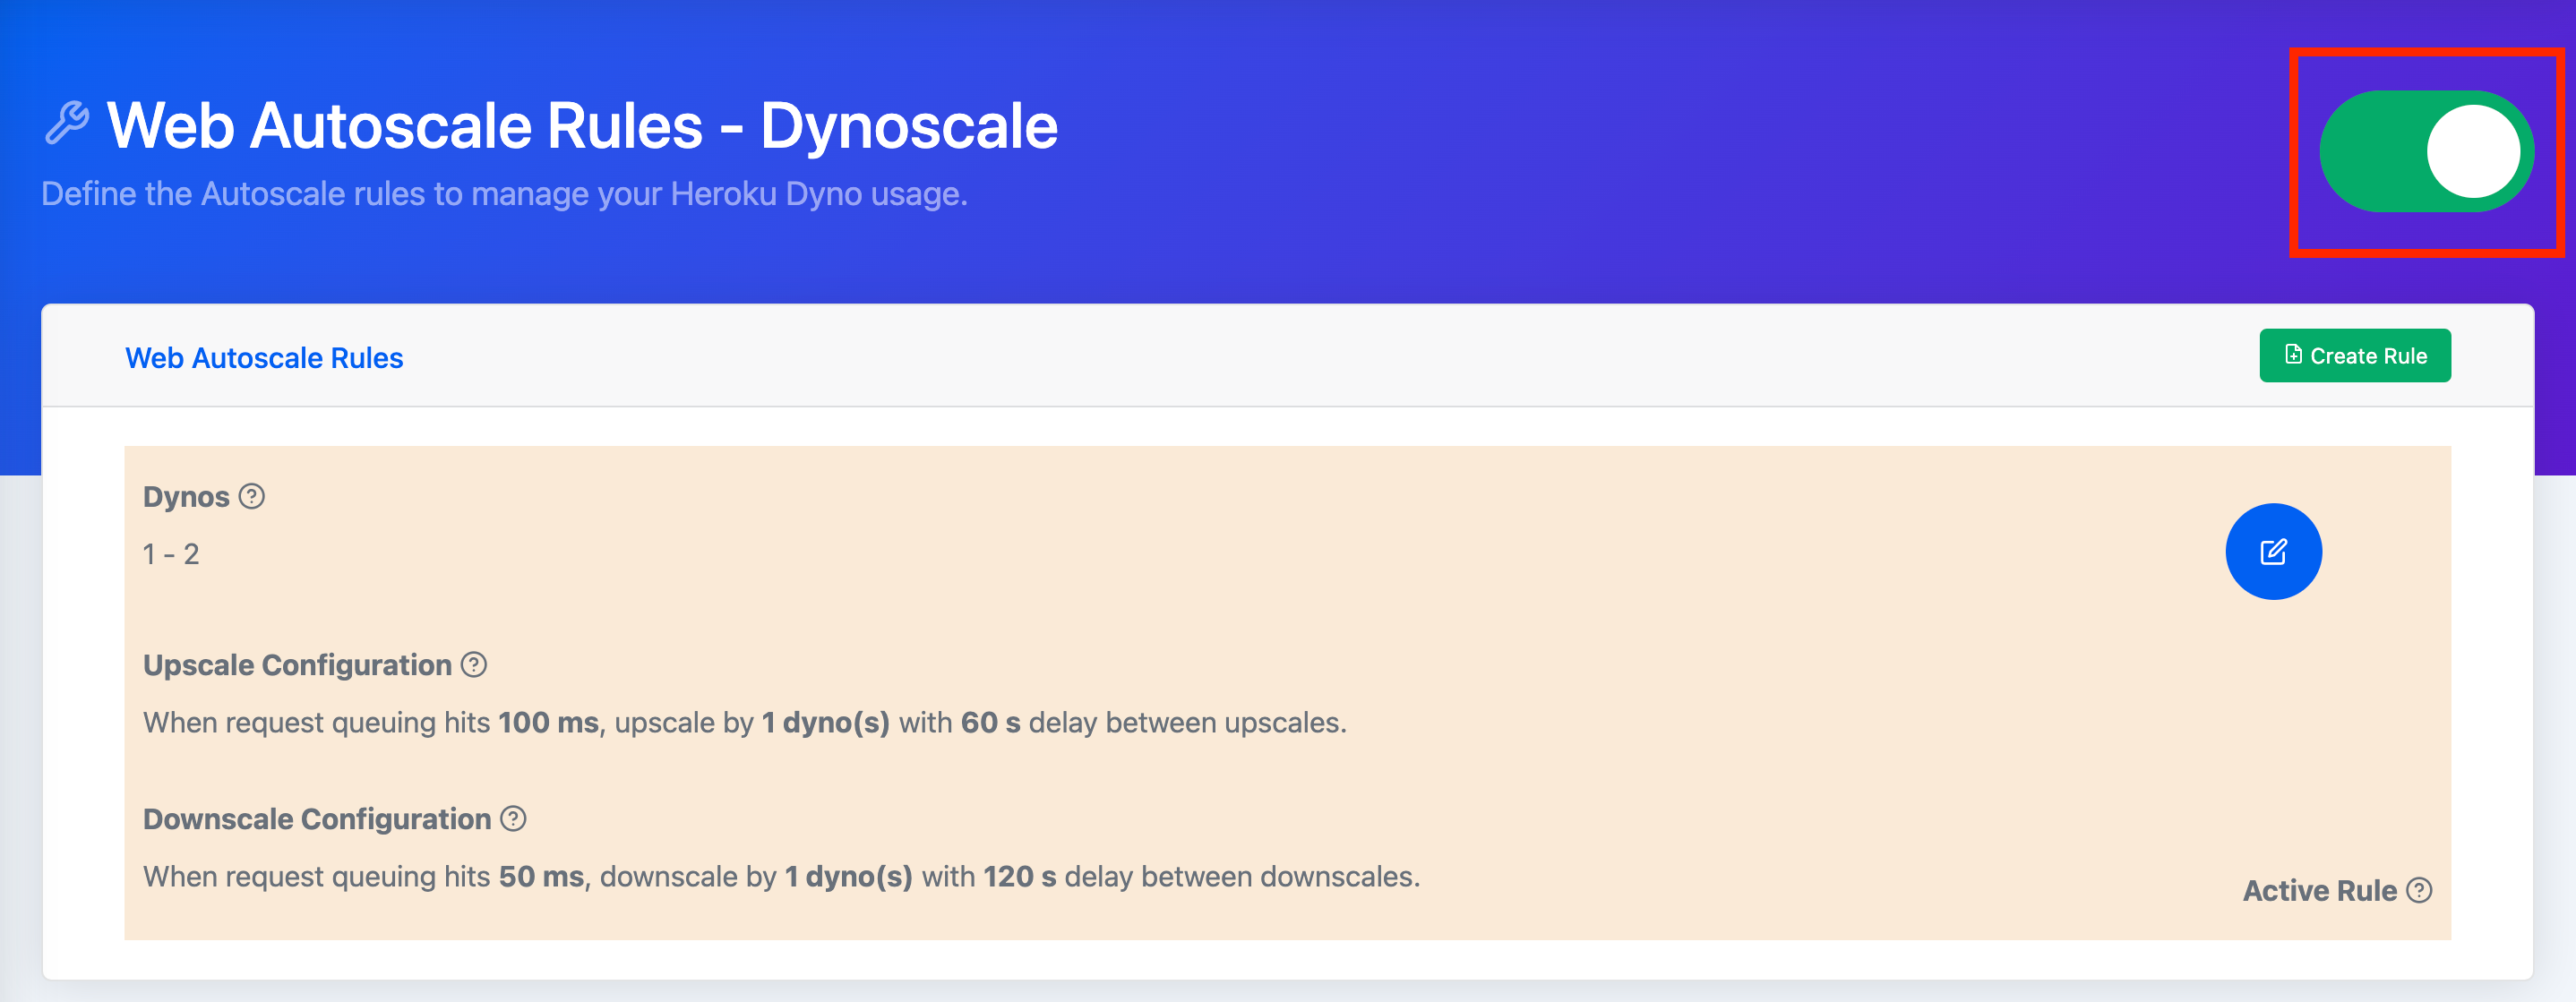
Once you are happy with the rules, click on the toggle on the upper right side of the page. Red indicates that your rules are off and greens your rules are active.
Worker Auto Scale Rules
Worker Auto Scale Rules have slightly different criteria which we will explore below.
Selecting Queues
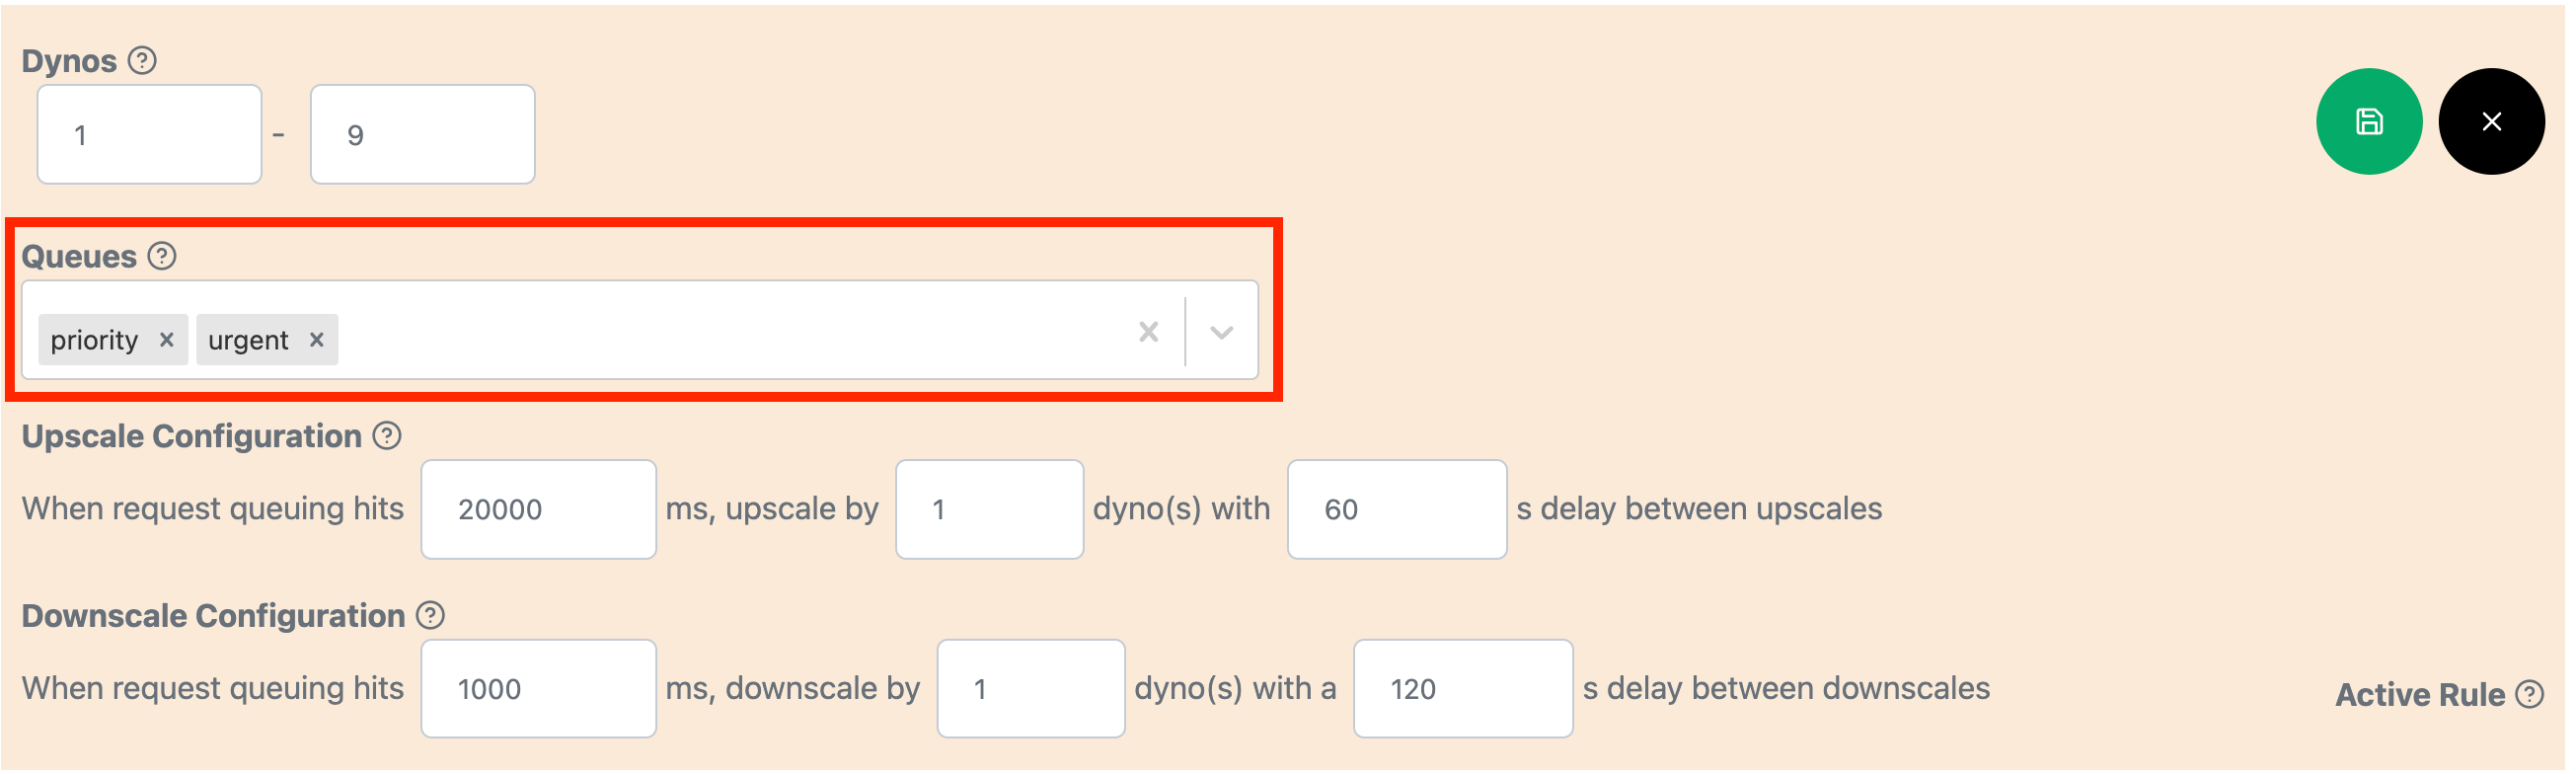
Most of the Worker Rule fields are the same as the Web Rule fields. One exception is the Queues field, it specifes which queues are applicable for a rule. To ensure a cost effective usage of autoscaling dynos, make sure to only include queues which have time sensitive execution.