

Setting up autoscaling doesn't require any special expertise on Heroku. In fact, a surprising 63 percent of Heroku app owners have not yet enabled autoscaling for their apps. But don't worry, it's easy to get started - in just 15 minutes, you can add autoscaling to your app and start saving money like a boss. This tutorial will show you exactly how to set up autoscaling for your application.
Autoscaling is an effective tool for improving the reliability of your applications. It automatically adjusts the number of dynos (i.e., computing resources) based on system traffic, increasing the number of dynos during high traffic and decreasing the number during low traffic. This helps to ensure availability while also saving you money. Autoscaling allows you to scale up or down automatically in response to traffic demands.
Is Heroku's Autoscaling suitable for your needs?
While Heroku's dyno autoscaling feature is useful, it does have certain limitations. Before we begin, let's take a moment to review those limits.
Do you have performance dynos?
If you choose to do so, Heroku will enable your application to use its autoscaling feature. However, it's worth noting that Heroku does not currently support autoscaling for standard Dynos. Another option for standard dyno autoscaling is Heroku Autoscaling, which is discussed in further detail below.
Is the processing time for all HTTP requests the same?
If the processing time for your HTTP requests is consistent, Heroku scaling could be a good fit for you. On the other hand, if the backend latency for your requests varies significantly (e.g., between 200-500ms), Heroku's autoscaling may trigger false positives, resulting in increased dyno time and costs. This is because Heroku's autoscaling is based on response time, not queue time, as explained in this blog post.
If you are experiencing this issue, you may want to consider an alternative solution that can effectively handle Heroku Autoscaling with high variance in backend latency. More information about this solution is provided below in the Heroku Autoscaling section.
Are you running in a private space?
If you have answered "yes" to the previous question, you will be able to use Heroku's scaling feature for programs hosted on a private space. If you do not have access to a private space, you may want to consider the alternative option listed below.
Heroku Autoscaling
Configuration
Navigate to the Resources tab of your application on the Heroku Dashboard.
 To enable autoscaling, click the "Enable Autoscaling" button next to the details of your web dyno.
 To set the bounds for your application's autoscale range, select the upper and lower limits. A preview of the estimated monthly cost for this range will be displayed below the dyno range. Your dyno count will always be scaled within the range you specify.
After setting the autoscale range, you will need to specify the desired p95 Response Time for your application. This value serves as the threshold that Heroku's autoscaling engine uses to determine when to adjust your dynos. A recommended p95 response time is provided below the field where you can enter your desired value.
If you would like to receive an email notification when your application is autoscaled to the maximum number of dynos, check the box provided. This notification will be sent at most once per day.
To finalize your autoscale configuration, click the "Confirm" button. This will immediately adjust your application's dynos to match the specified autoscale settings.
Autoscaling Logic
The autoscaling engine uses the Desired p95 Response Time that you set in the previous step to determine when to scale your app. To do this, it analyzes data from the past hour to calculate the number of dynos needed to achieve the desired response time for 95% of incoming requests. The autoscaling algorithm uses this information to determine when to adjust the number of dynos.
If the autoscaling engine determines that the current number of dynos is not sufficient, it will add or remove a single dyno from your app. Autoscaling events are limited to a maximum of one per minute.
The autoscaling engine is designed to scale down more slowly than it scales up. This is to prevent a sudden reduction in the number of dynos from causing high latency if there is a sudden increase in demand following a temporary lull in requests.
If your application receives no requests for 3 minutes, the dynos will begin scaling down at 1-minute intervals until request throughput resumes.
Monitoring Autoscale Events
To view information about scaling events for your Heroku application, go to the "Metrics" tab and look at the "Events" chart. You can see what triggered a scaling event by hovering over it. Autoscaling events initiated by Heroku are labeled "Dyno Autoscaling". If multiple autoscaling events occurred during the same period, only the point where the scaling direction changed is shown.
Disabling Autoscaling
 To disable autoscaling for your application, go to the "Resources" tab on the Heroku Dashboard. Then, click the "Disable Autoscaling" button and choose a fixed dyno count.
Dynoscale Autoscaling
Dynoscale is a Heroku Autoscaling Addon that addresses many of the limitations of Heroku's built-in autoscaling engine.
Dynoscale works with both standard and performance dynos, giving you flexibility in choosing the right resources for your application. In addition, Dynoscale uses queue time instead of response time to determine when to scale your application. This ensures that long-running code in your application won't trigger false positives based on response time, as explained in this blog post.
Configuration
Dynoscale is currently available for Ruby and Python applications. To install it for a Ruby/Rails application, follow the getting started instructions. To install it for a Python application, use the getting started instructions.
 After installing the Dynoscale Addon, you can set up the scaling rules by specifying the Autoscaling Logic. If you have the Heroku CLI installed, you can open Dynoscale in a terminal by running
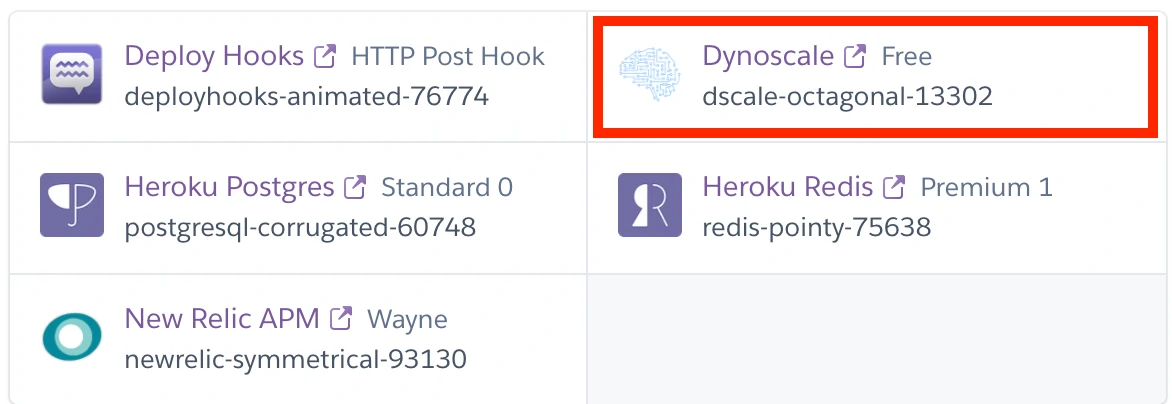
 heroku addons:open dscale. If you do not have the Heroku CLI installed, you can access Dynoscale through the "Resources" tab of your application in the Heroku Dashboard.
Autoscaling Logic
 Next navigate to the Web Autoscale Rules to setup the autoscaling logic. Click on the blue edit rule button.
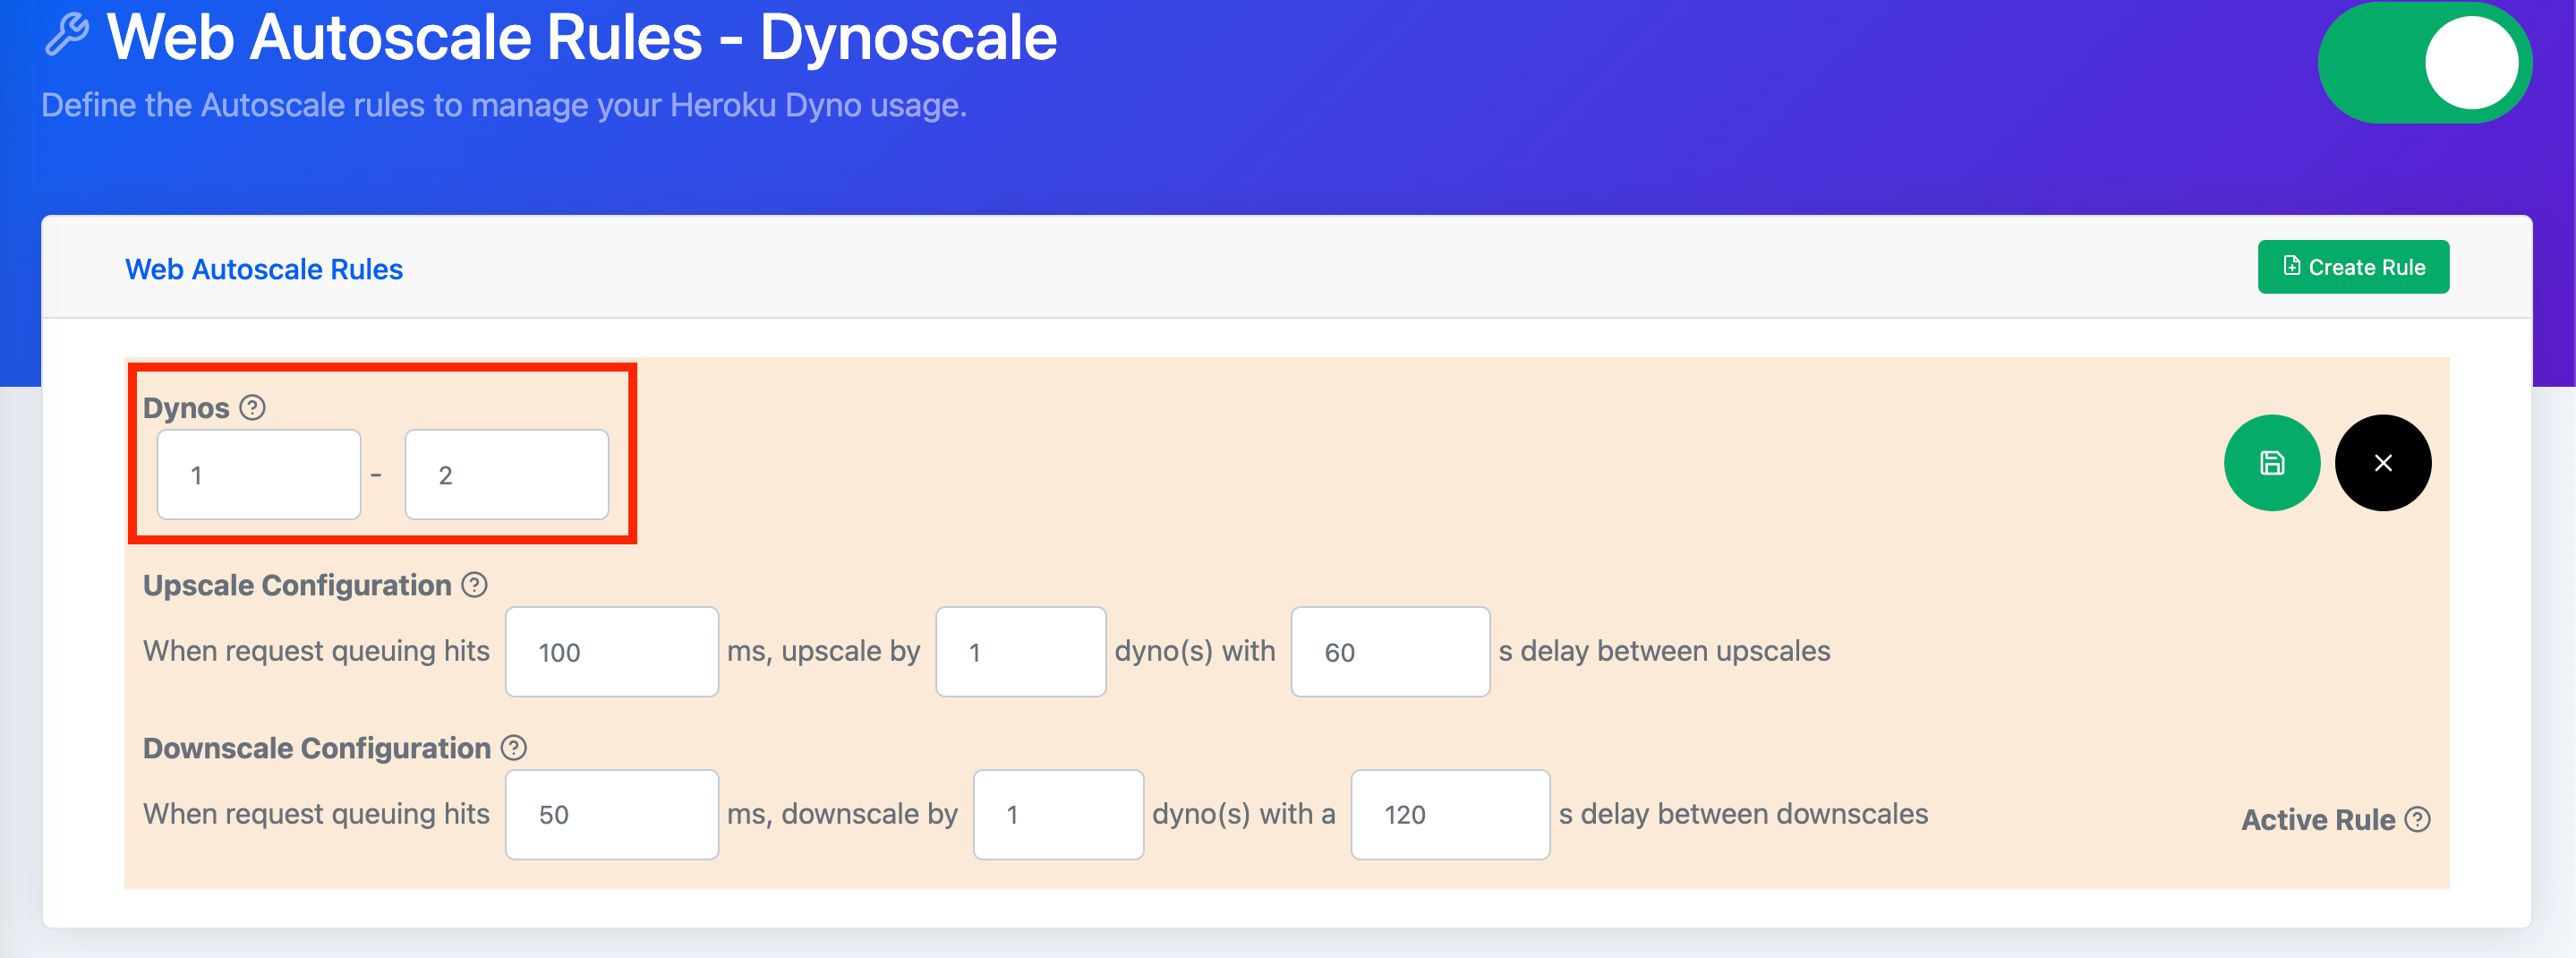 On the upper left side of the rule, you will see the upper and lower bounds for dynos. These bounds specify the maximum and minimum number of dynos that this rule will allow. For a low-traffic application with occasional periods of high traffic, it may be advisable to set the lower bound to 1 and the upper bound to 2.
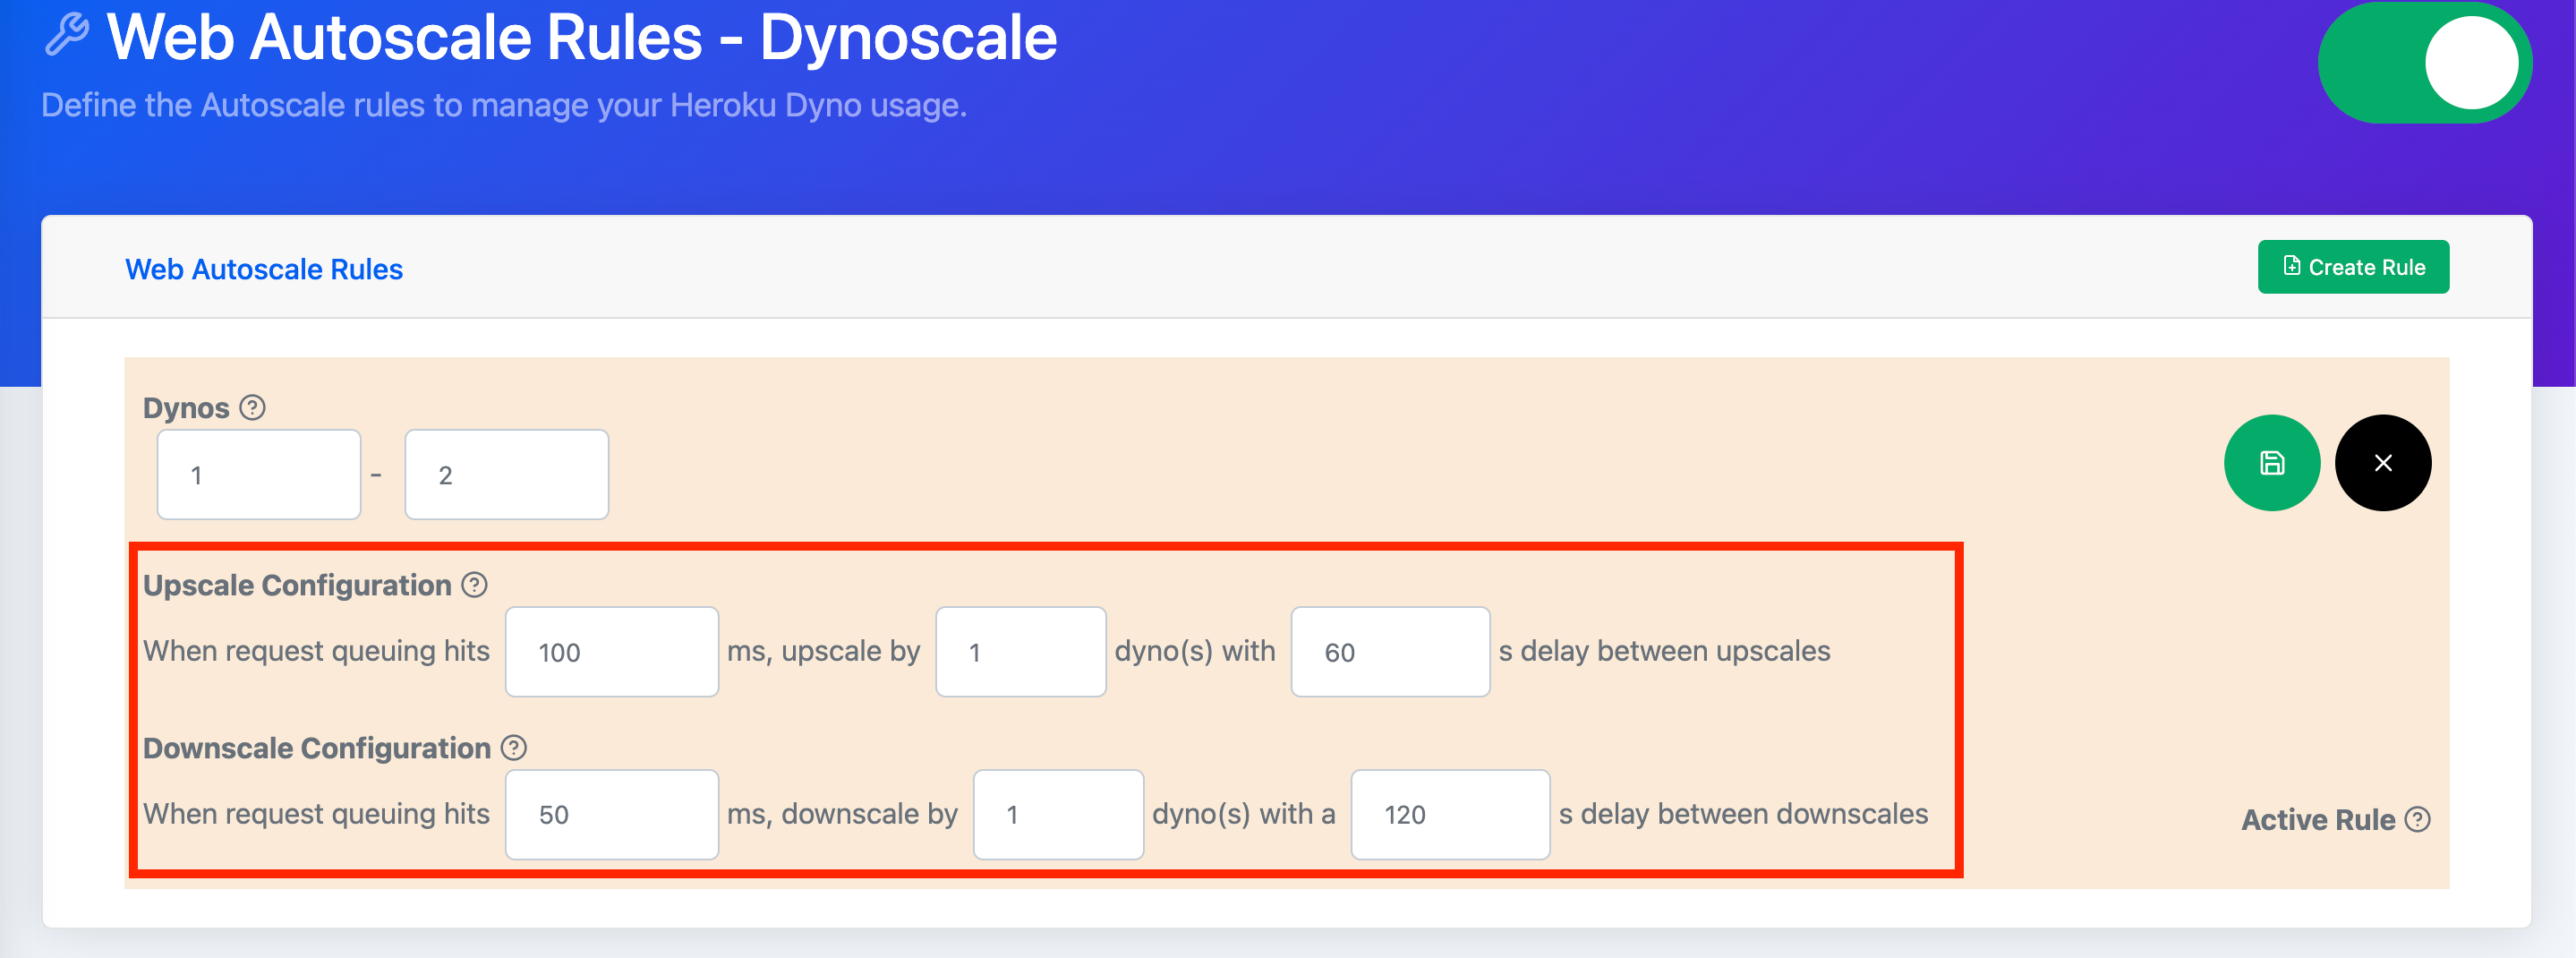 On the lower left side of the rule, you will see the Upscale and Downscale Configuration. The Upscale Configuration includes a field for the request queue threshold, which determines when your application needs additional dynos to handle the traffic. Once this threshold is exceeded, Dynoscale will scale up your application by the increment specified in the next field. To prevent frequent scaling up, the last field introduces a delay between incremental scale-ups using a buffer time.
On the Downscale Configuration, the first field is the request queue threshold, which determines when it is appropriate to reduce the number of dynos to match the traffic needs of your application. Once the request queue falls below this threshold, Dynoscale will scale down your application by the increment specified in the next field. To prevent frequent scaling, the last field introduces a delay between incremental scale-downs using a buffer time.
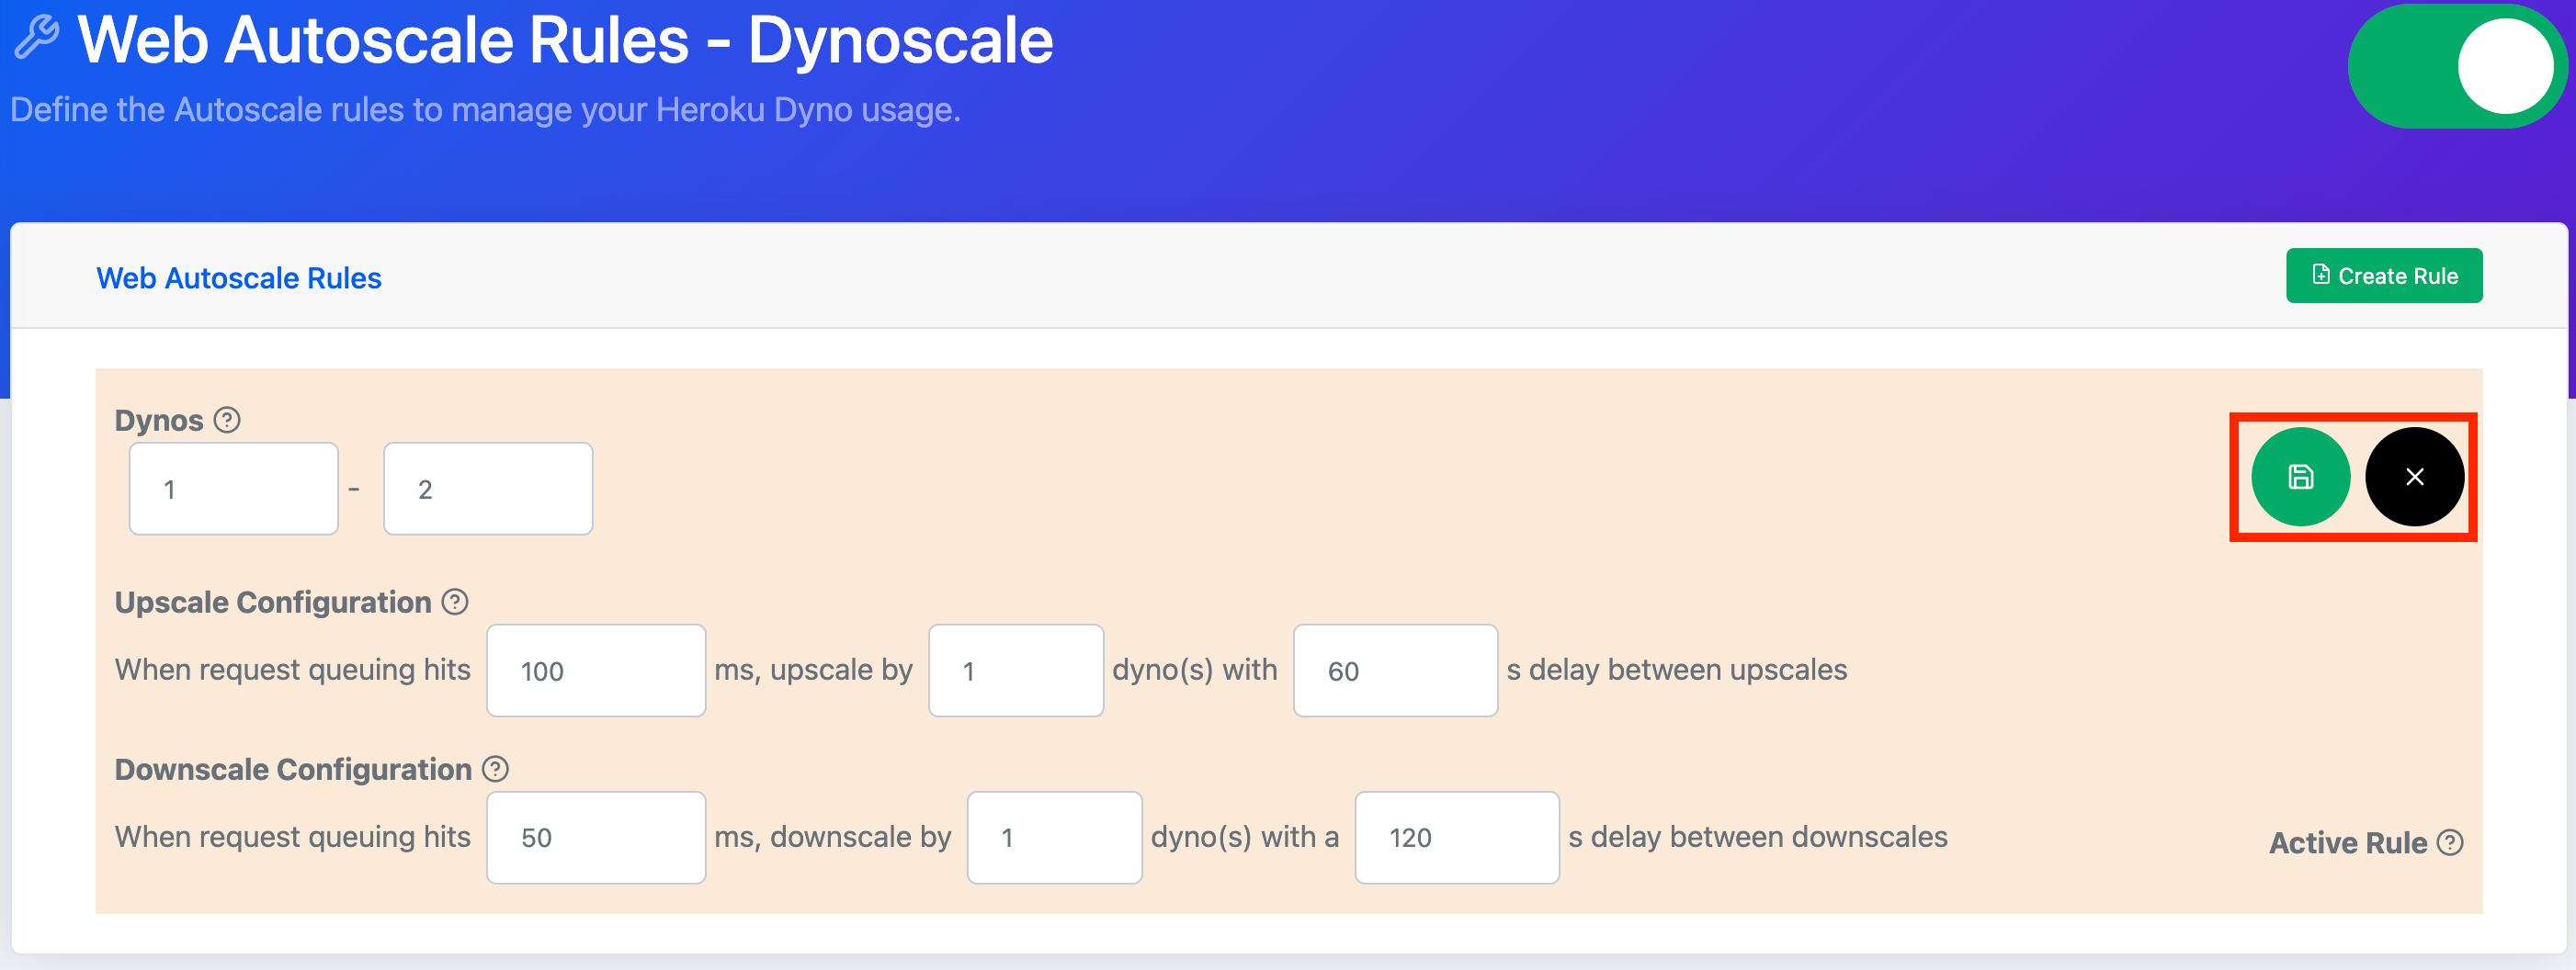 To save the changes you have made to a rule, click the green "Save" button in the upper right corner of the rule. If you do not want to save your changes, click the black "Cancel" button.
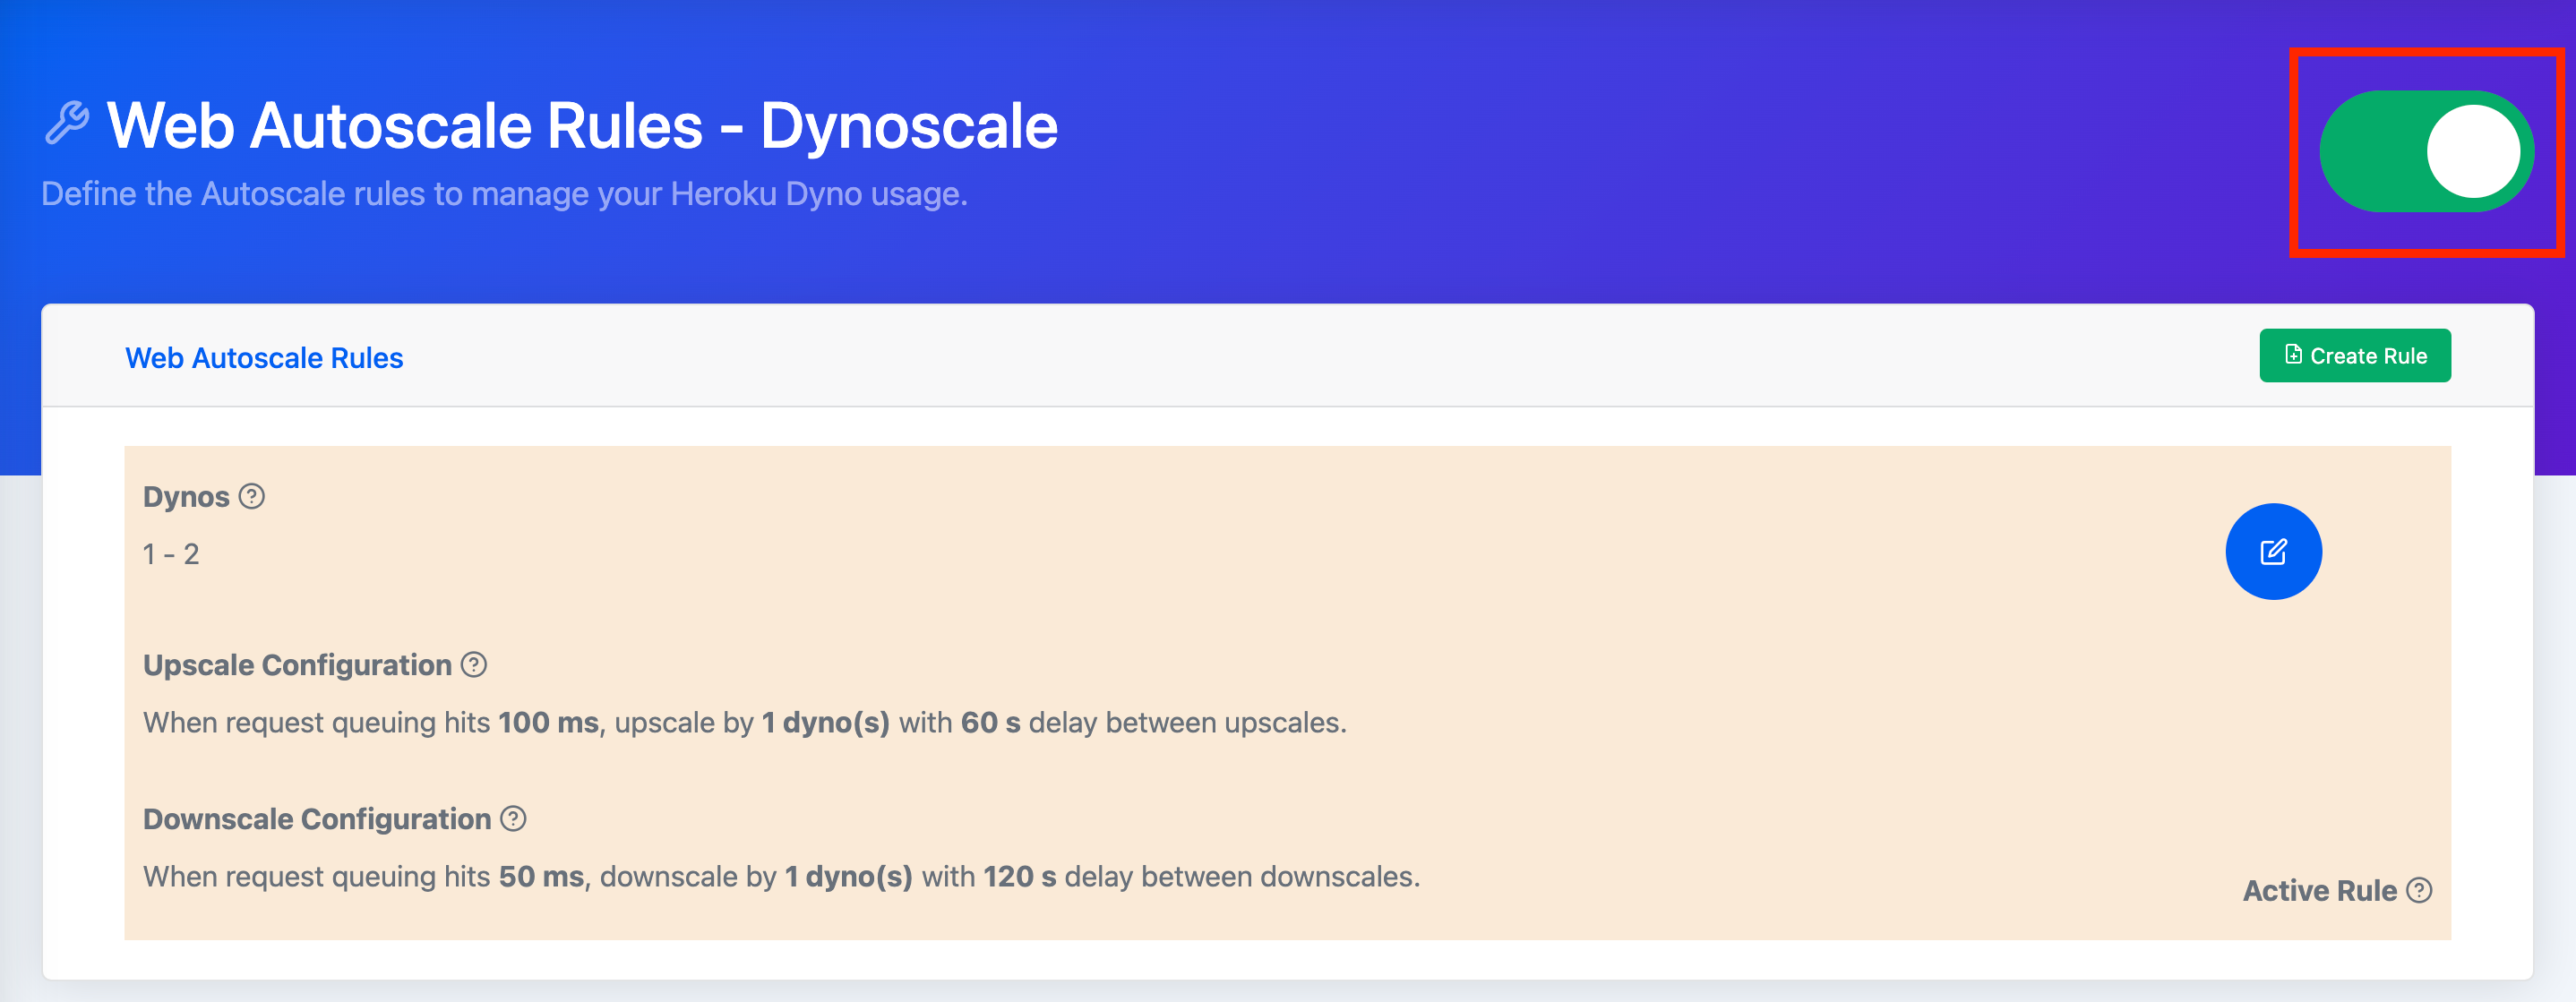 Finally click on the toggle on the upper right side of the page. Red indicates that your rules are off and green your rules are active.
Monitoring Autoscale Events
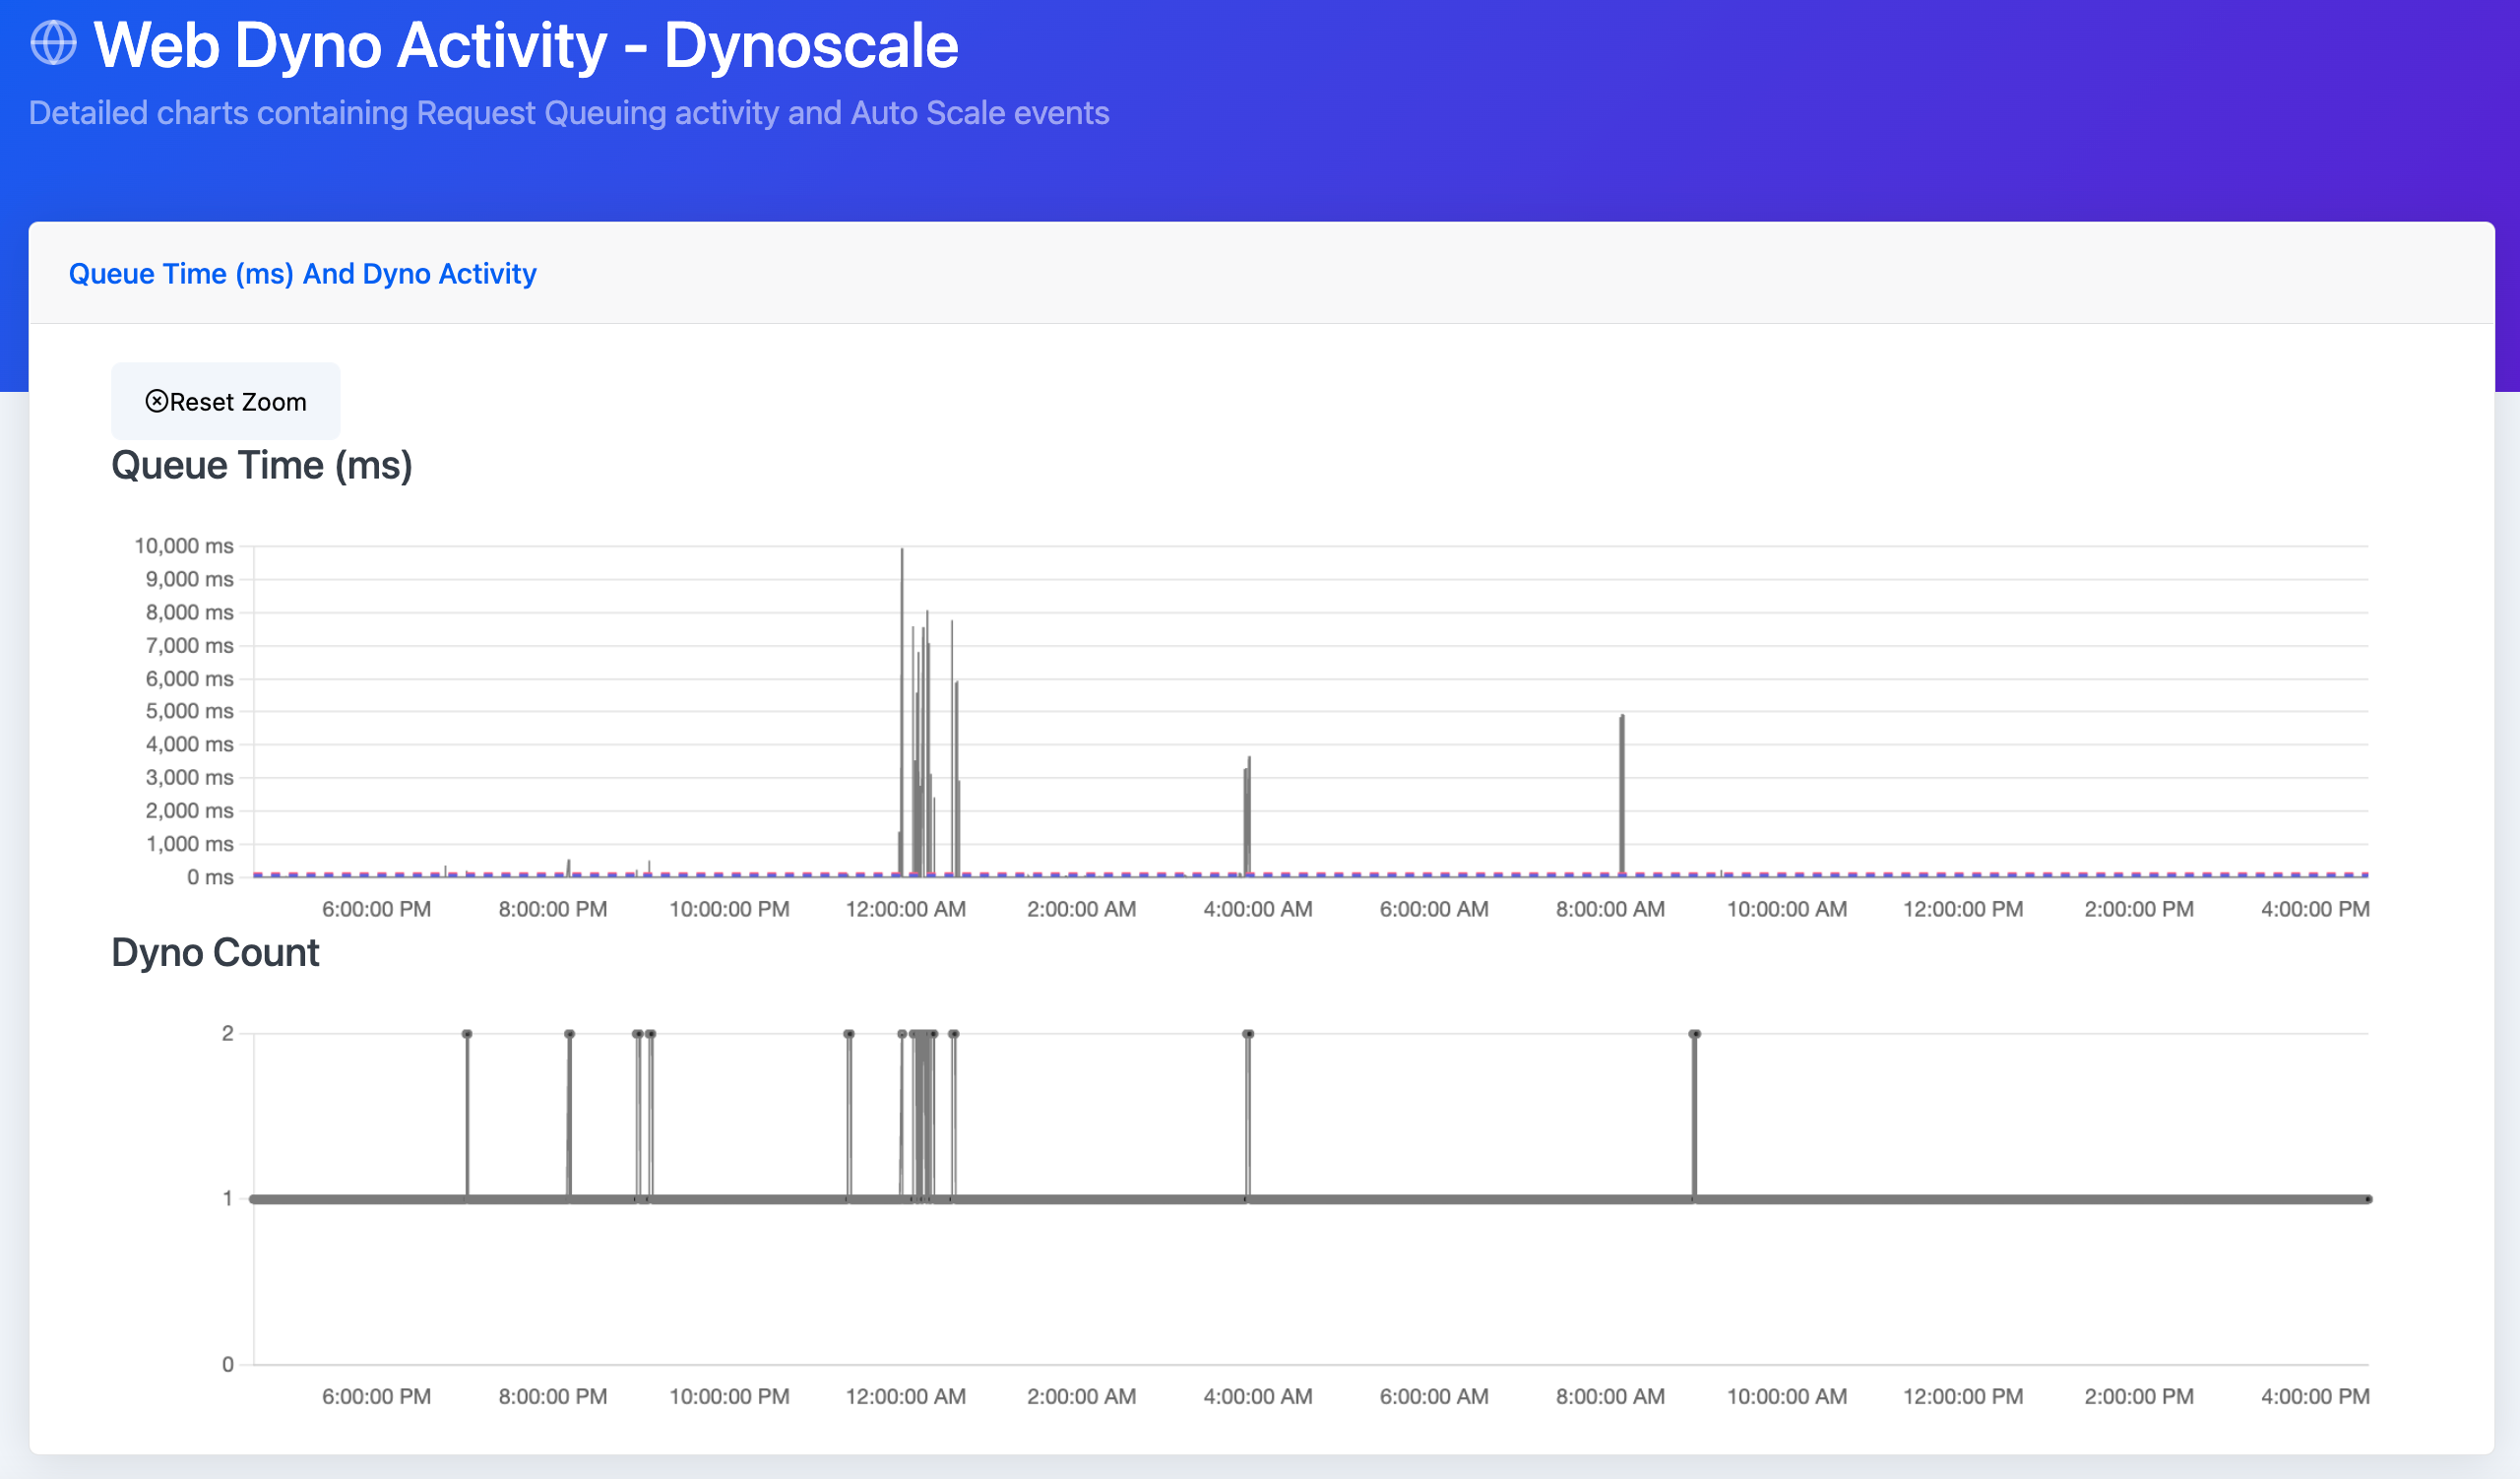 In addition to the Heroku Dashboard, you can find information about scaling on the Web Dyno Activity Page. This page displays queue time and dyno scaling charts for the past 24 hours.
Disabling Autoscaling
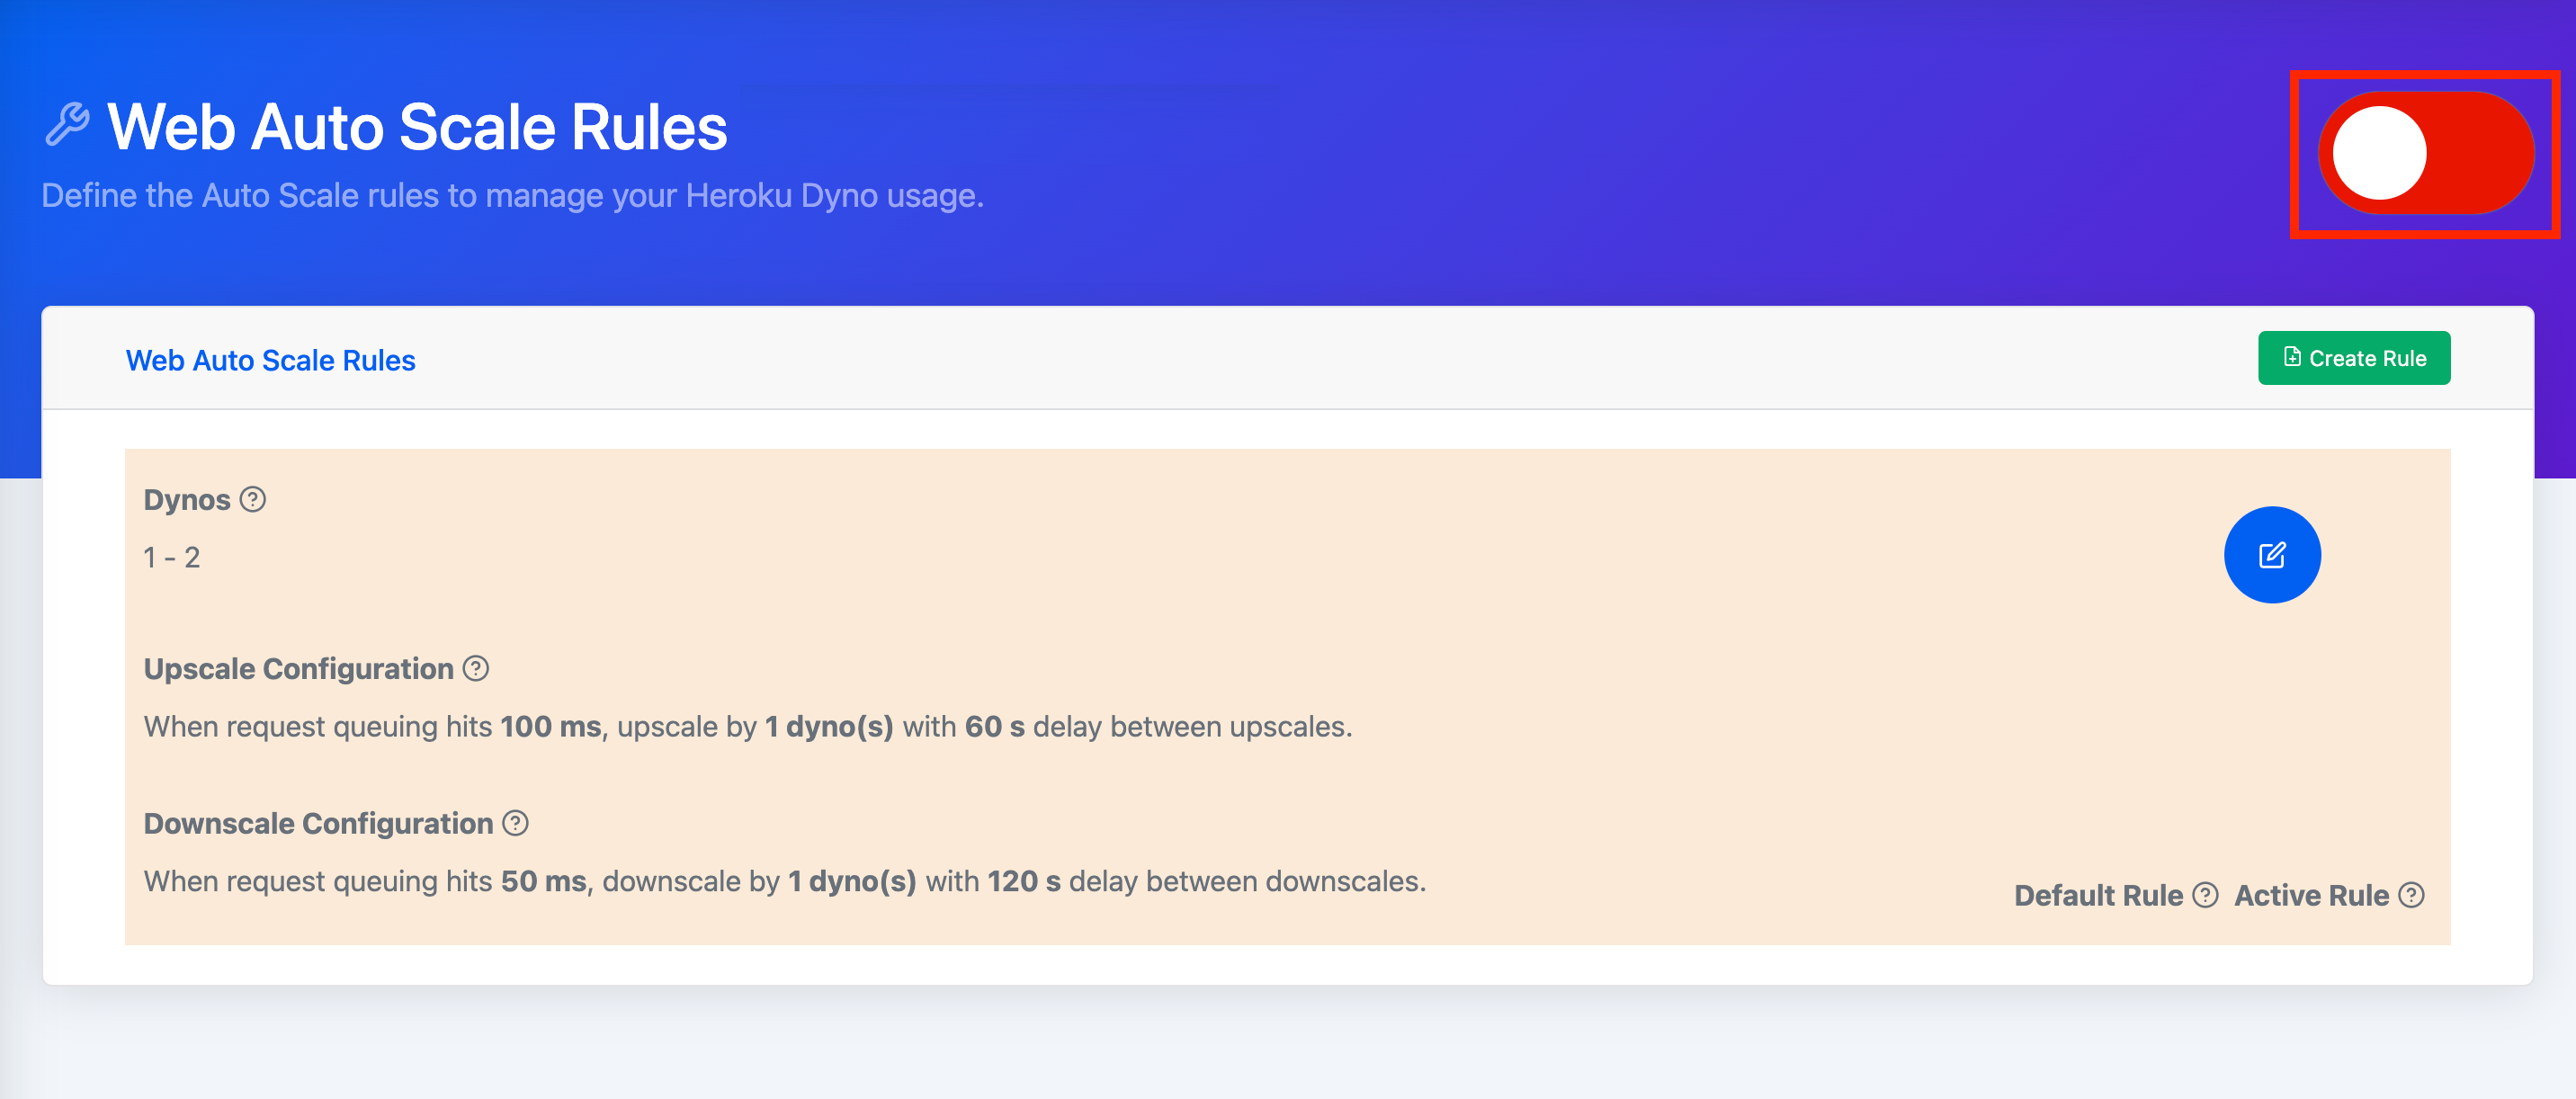 To turn off autoscaling for your Heroku application, go to the Web Autoscaling Rules page and click the toggle in the upper right corner of the screen. When the toggle is red, the rule is off.
Conclusion
This article outlines the scenarios in which Heroku's autoscaling solution is the best choice for your application. It also provides a guide to setting up basic autoscaling configuration, so you can take control of your application's performance like a boss.
If Heroku's Autoscaling is not a good fit, this article details an alternative called Dynoscale and outlines quick, easy setup instructions.

heroku addons:create dscale